Integrating HReasily Pro with NetSuite lets you automatically sync approved payrolls into NetSuite as journal entries. This helps your HR, Finance and Payroll teams reduce manual work, minimize errors and streamline payroll posting.
This guide walks you through the full setup process: creating your NetSuite integration, generating your Client ID and Secret, connecting HReasily, mapping pay items, and finally syncing payroll data directly into NetSuite.
Step 1: Create Integration in NetSuite
1. In your NetSuite account, navigate to Setup > Integration > Manage Integrations > New.

2. Fill in the required details:
Set STATE to Enabled
Under OAuth 2.0, select Authorization Code Grant
Enter the Redirect URL provided by HReasily: https://secure.pro.hreasilygroup.com/app-marketplace/callback/netsuite/
Under Scope, select Rest Web Services

3. Click Save. NetSuite will now generate your Client ID and Client Secret.

⚠️ Important: Copy and store both values securely. NetSuite will not display them again after you leave the page.
Step 2: Connect HReasily to NetSuite
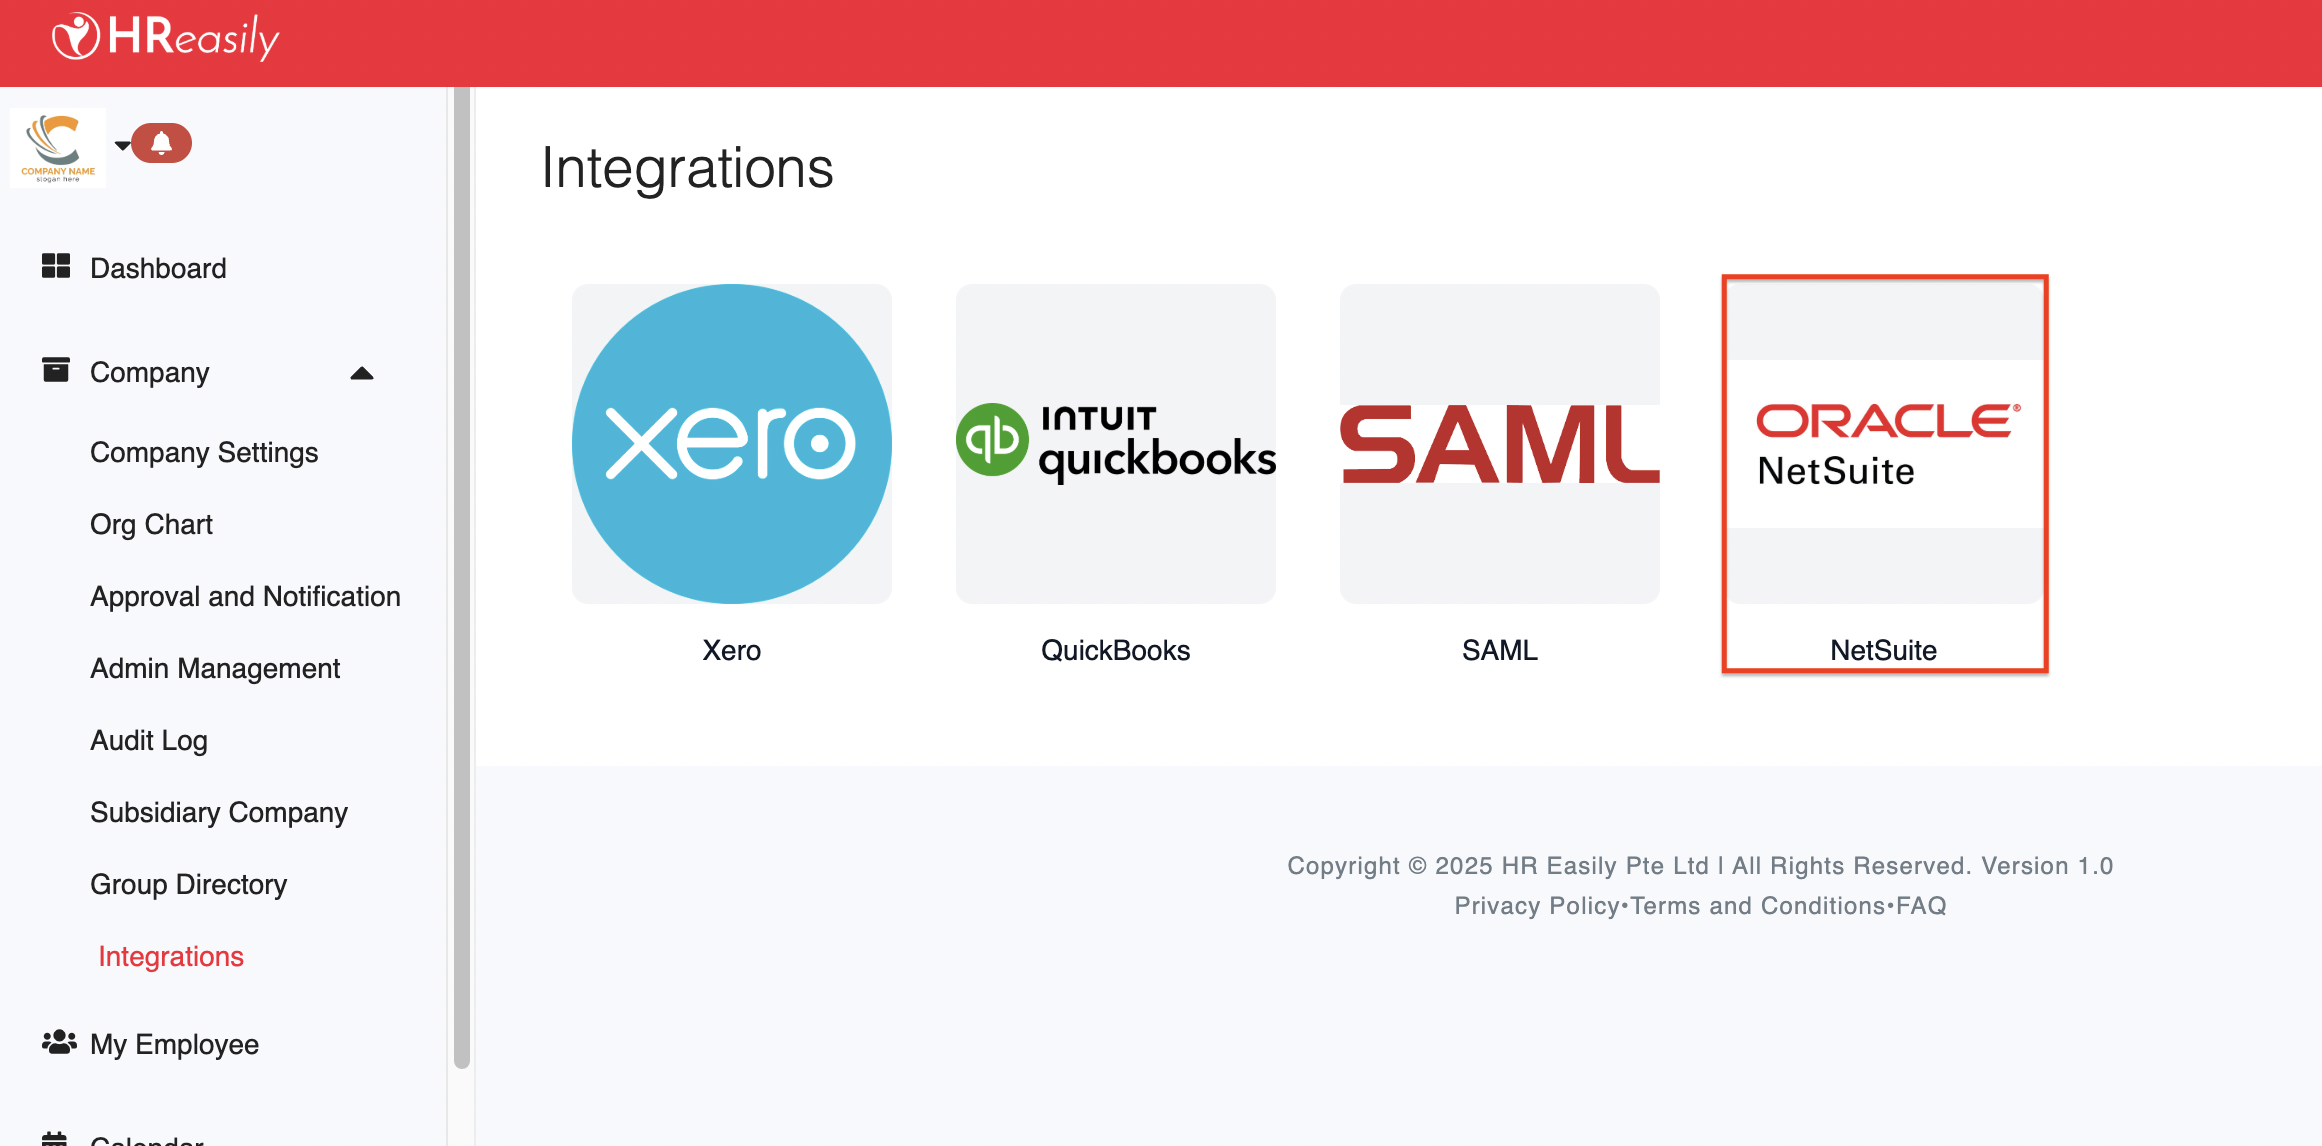
1. Go to Company > Integrations > NetSuite.
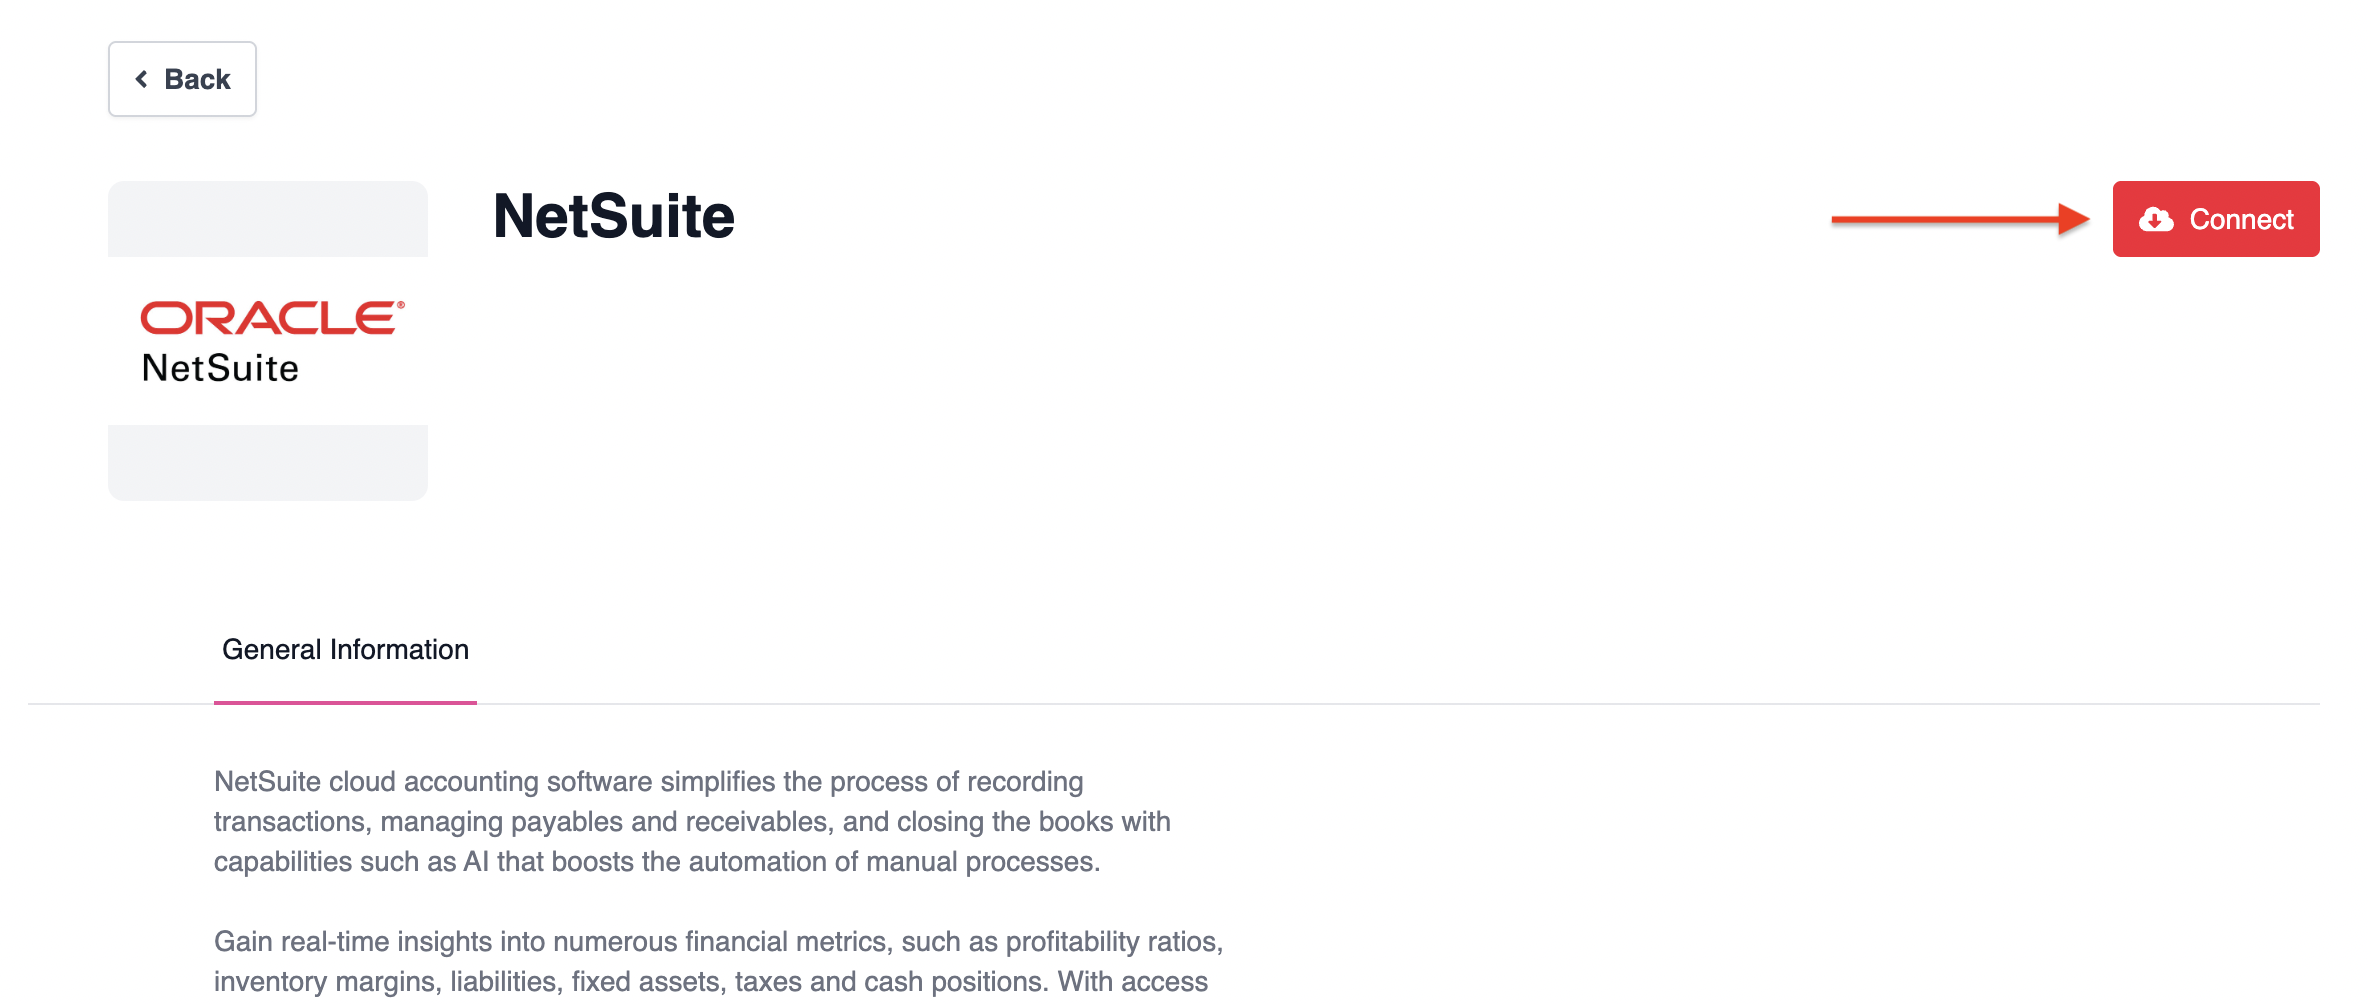
2. Click Connect.
3. Enter the following details:
Account ID (Realm): The subdomain portion of your NetSuite URL
Client ID and Client Secret: The values generated earlier in NetSuite
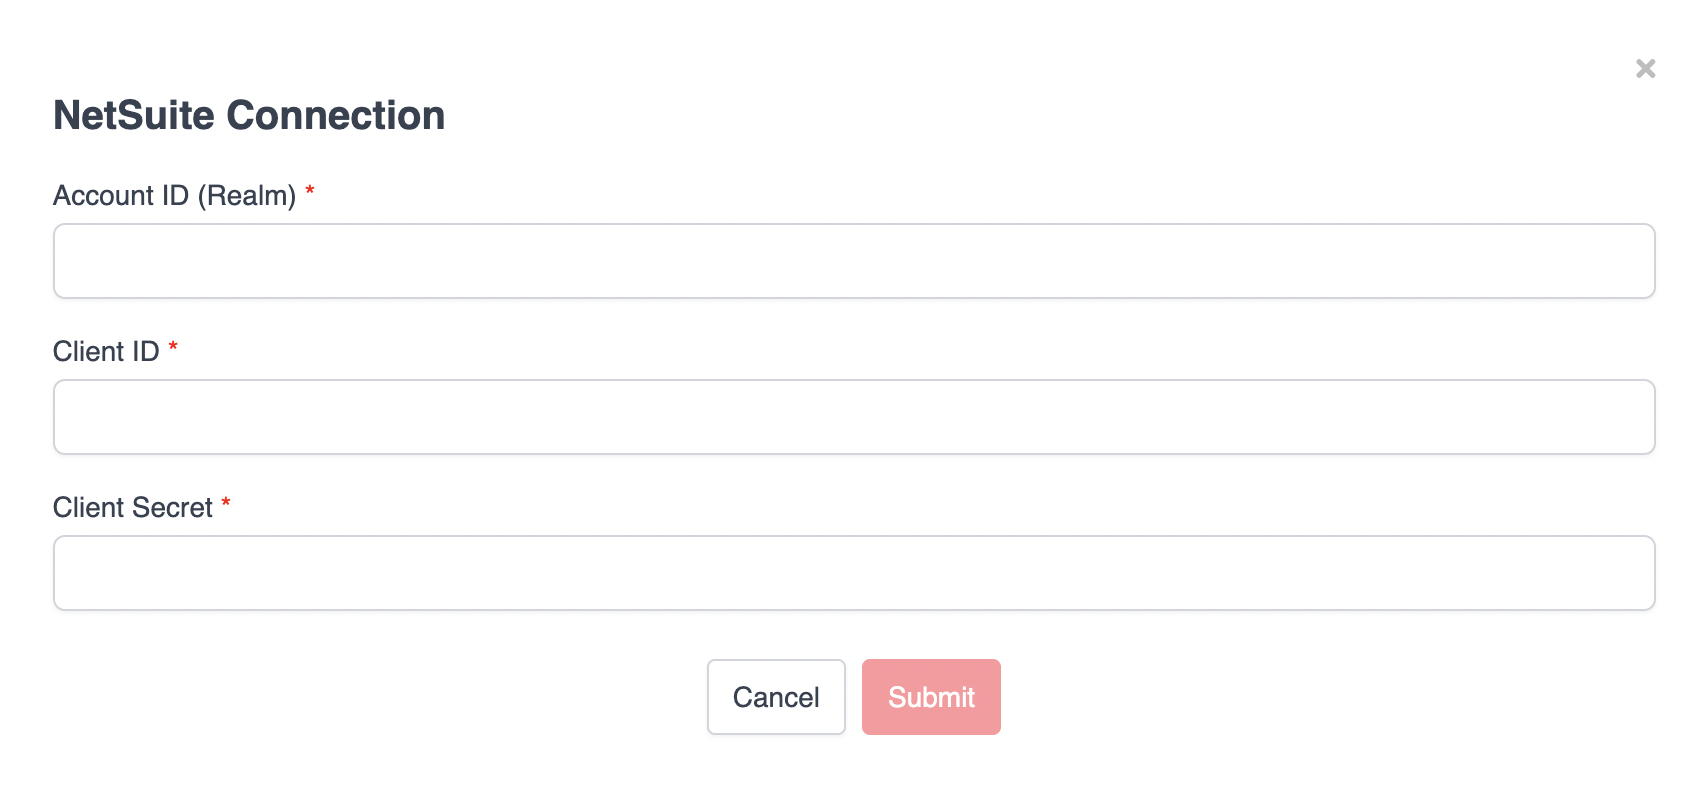
4. Click Submit.
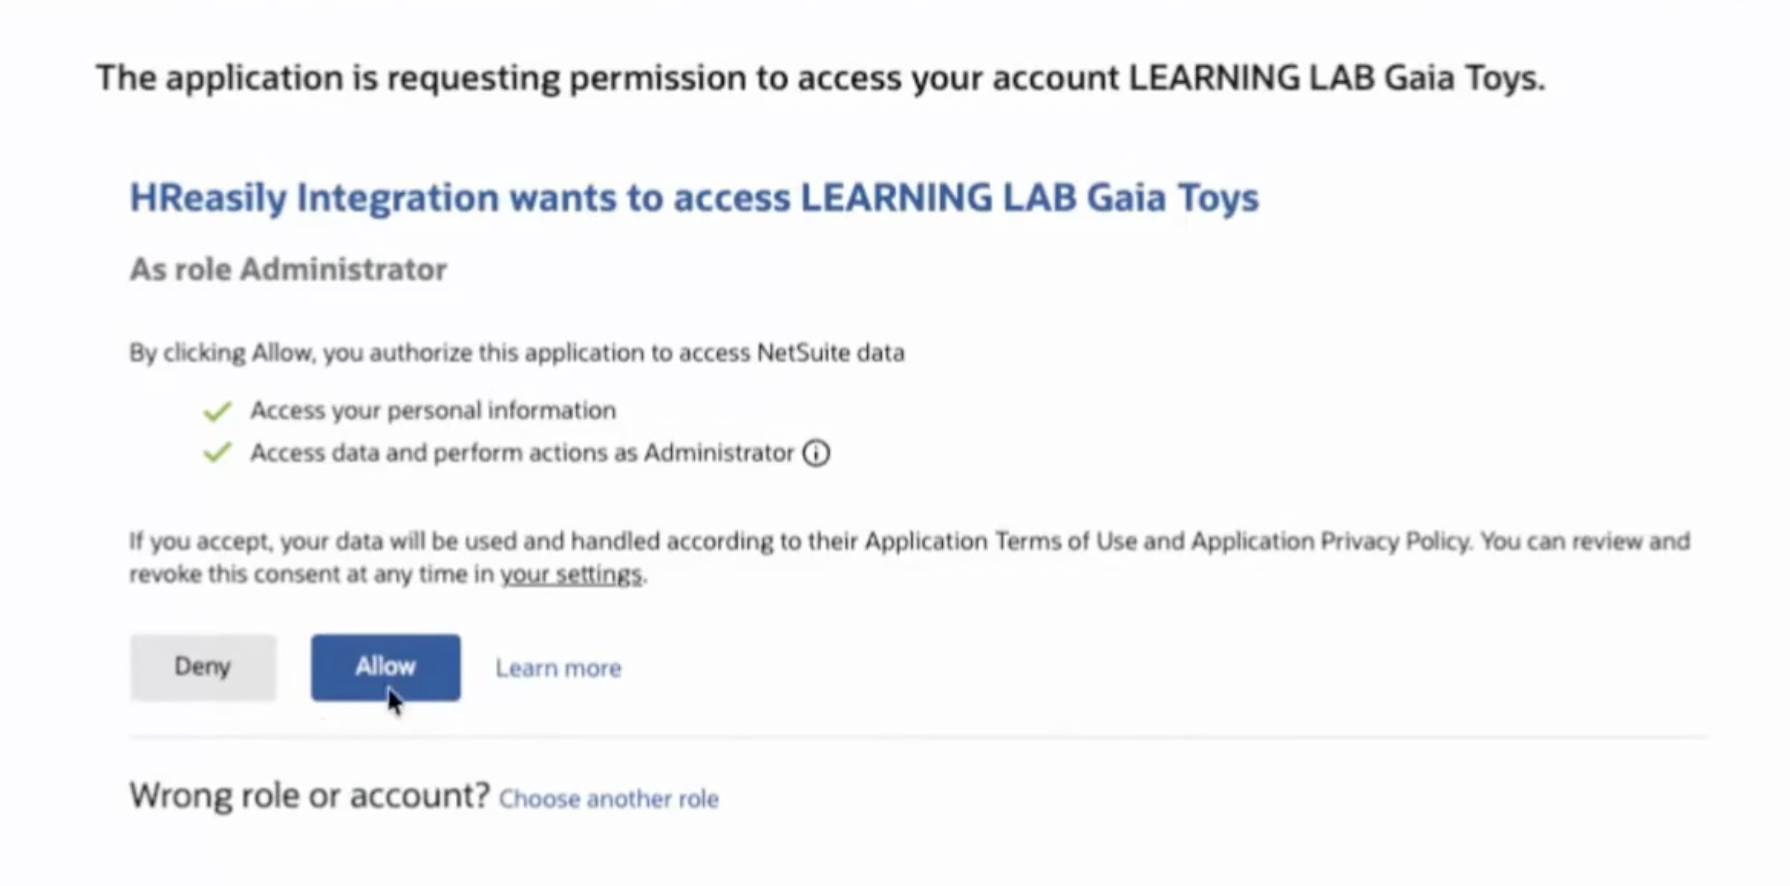
5. A new authorization window will appear, click Allow.
6. Once authorized, you will see a confirmation message.

Step 3: Configure App Settings
After authorization, configure how HReasily posts data to your NetSuite account.
In the App Settings tab, enter your Subsidiary ID and click Save settings. This ensures payroll data is synced to the correct subsidiary.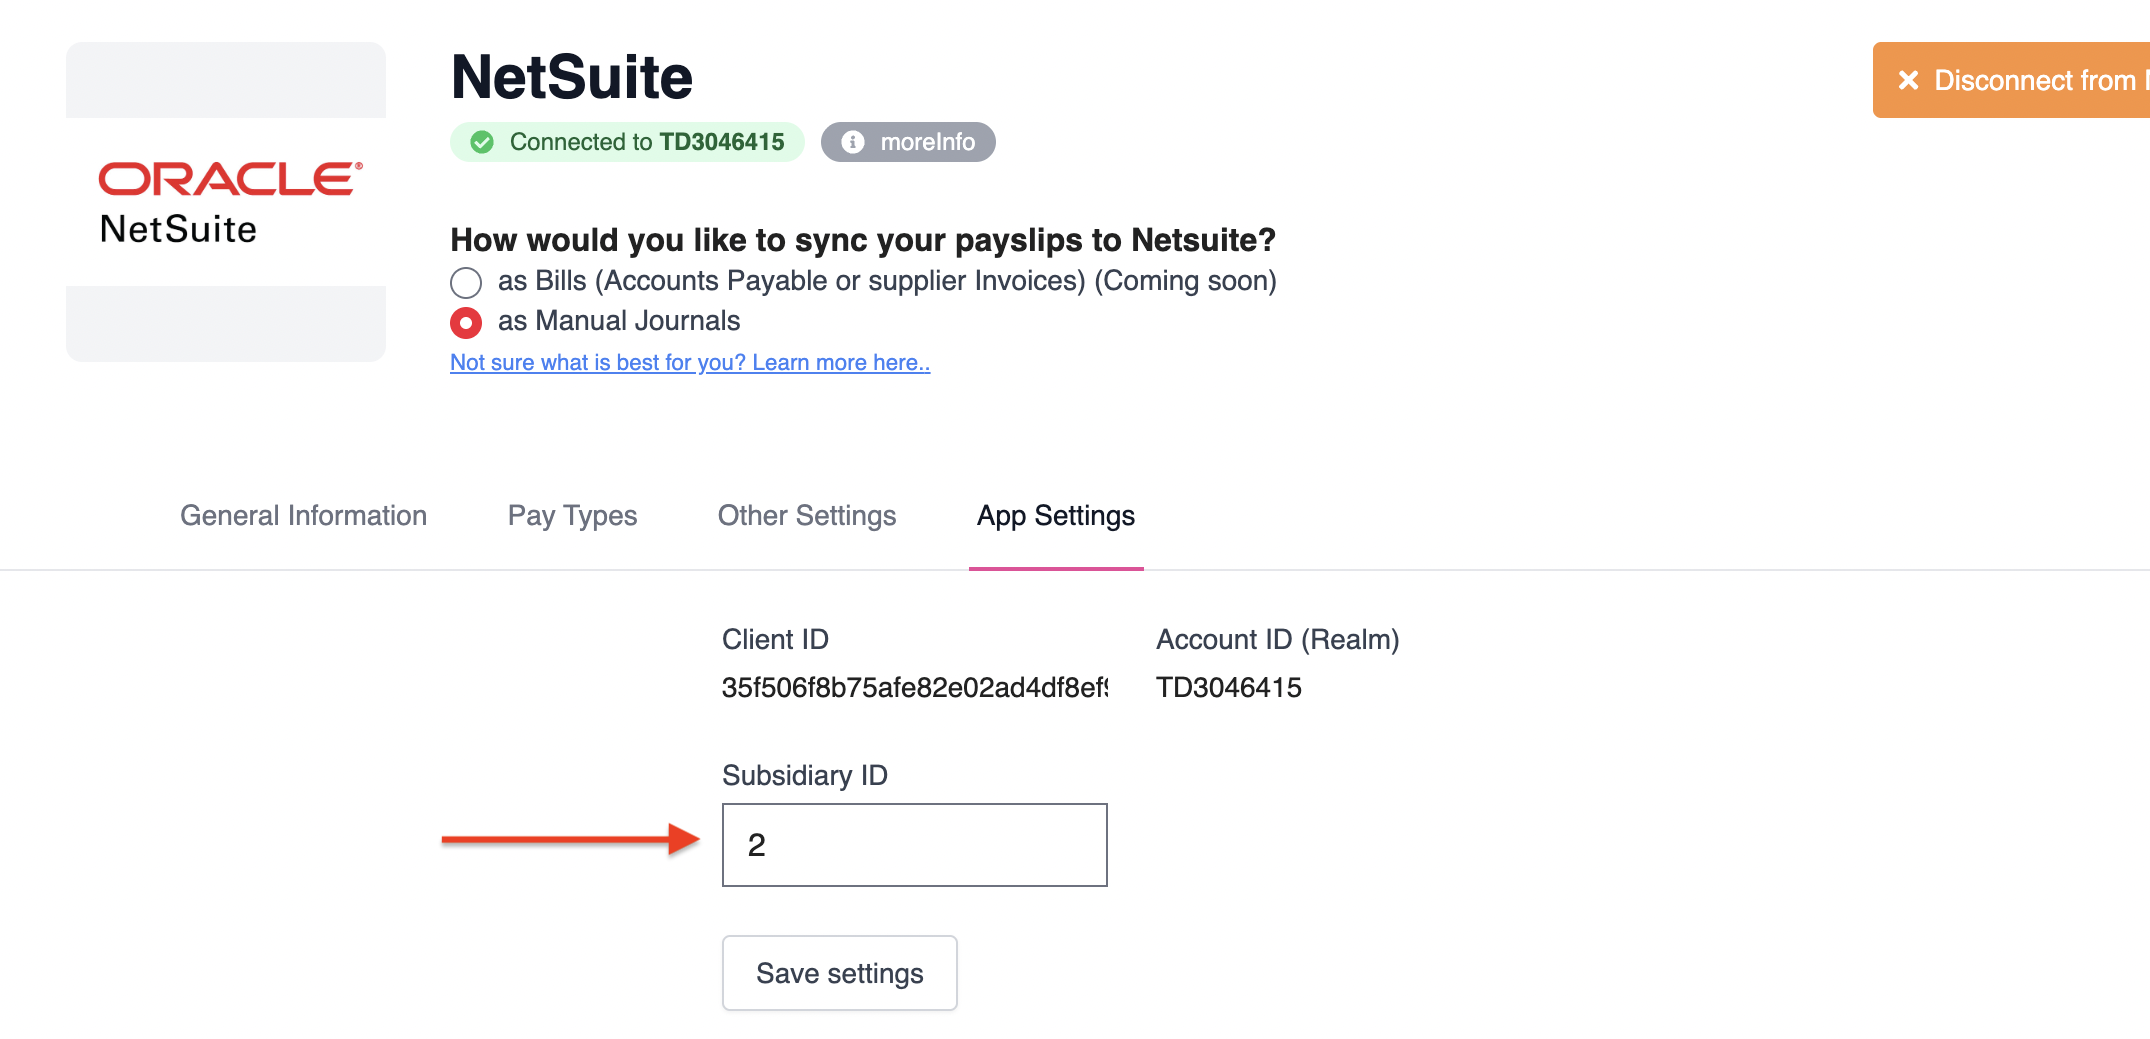
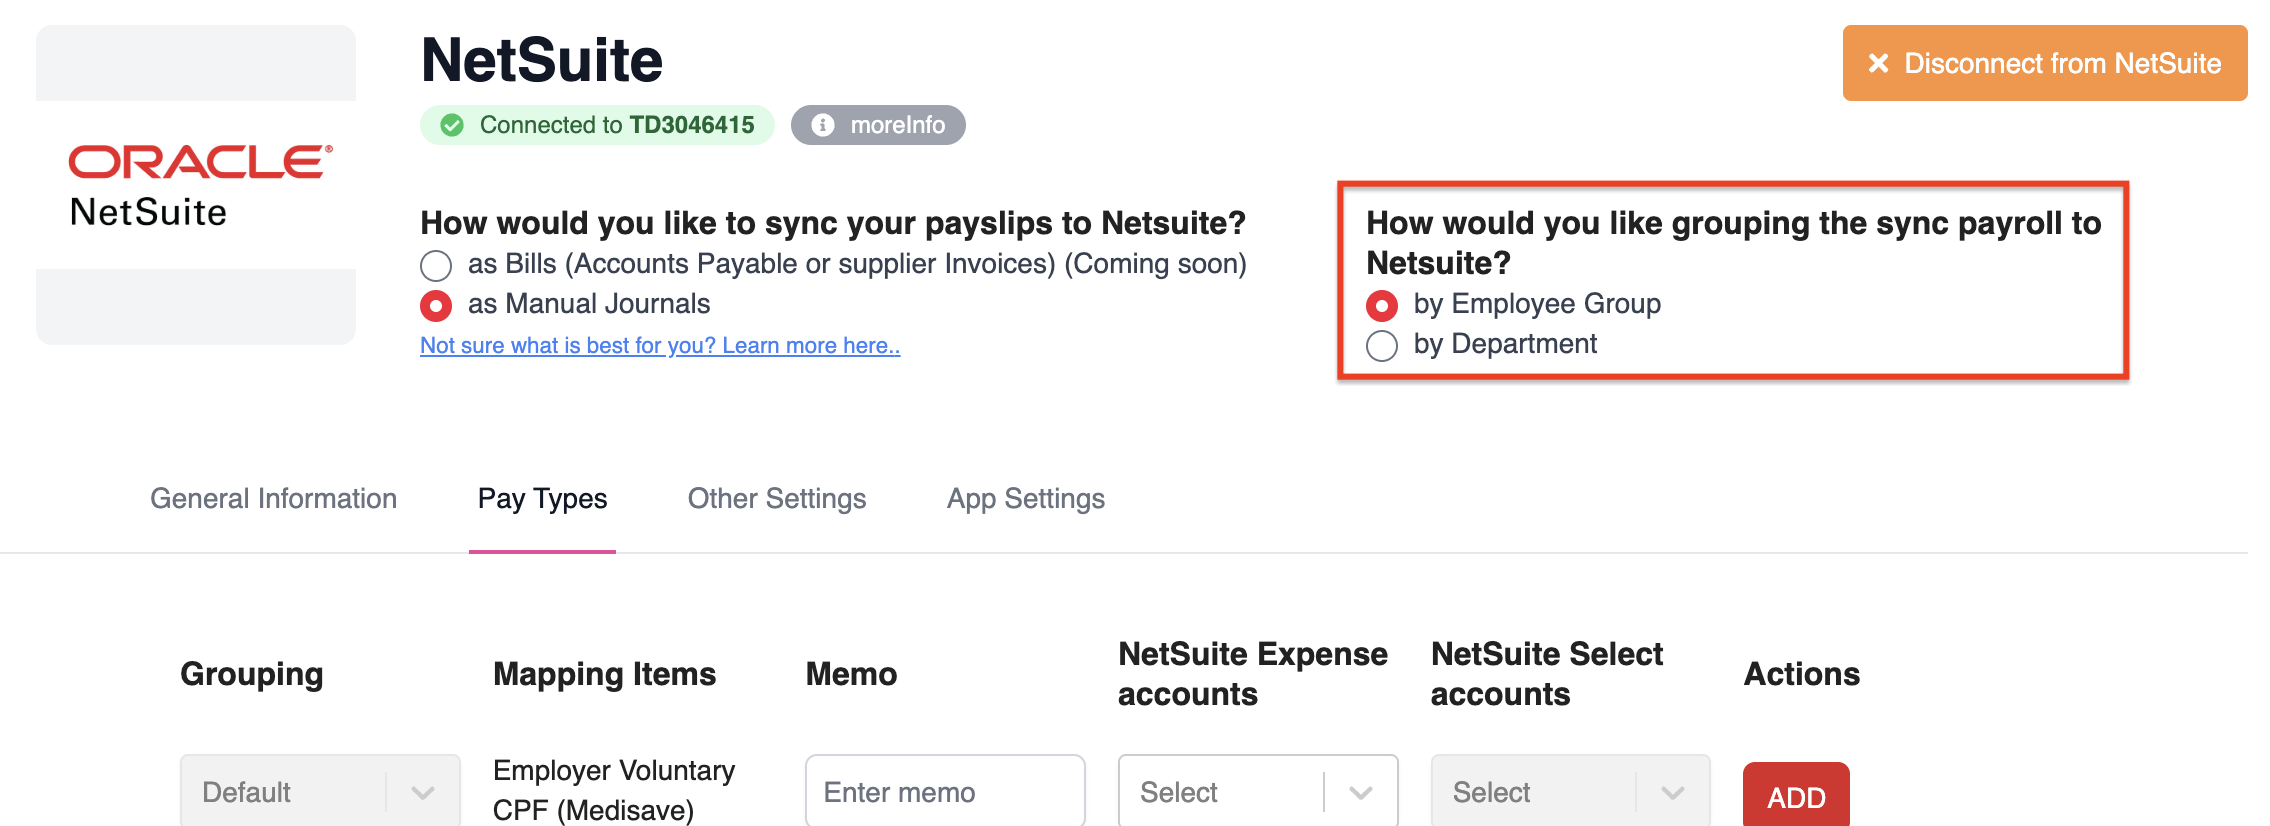
Step 4: Map Pay Types
1. Go to the Pay Types tab.
2. Before mapping, choose your preferred grouping method:
3. For each pay item, choose the matching NetSuite expense account, then select the debit and credit accounts from the dropdown. Your mappings will save automatically.
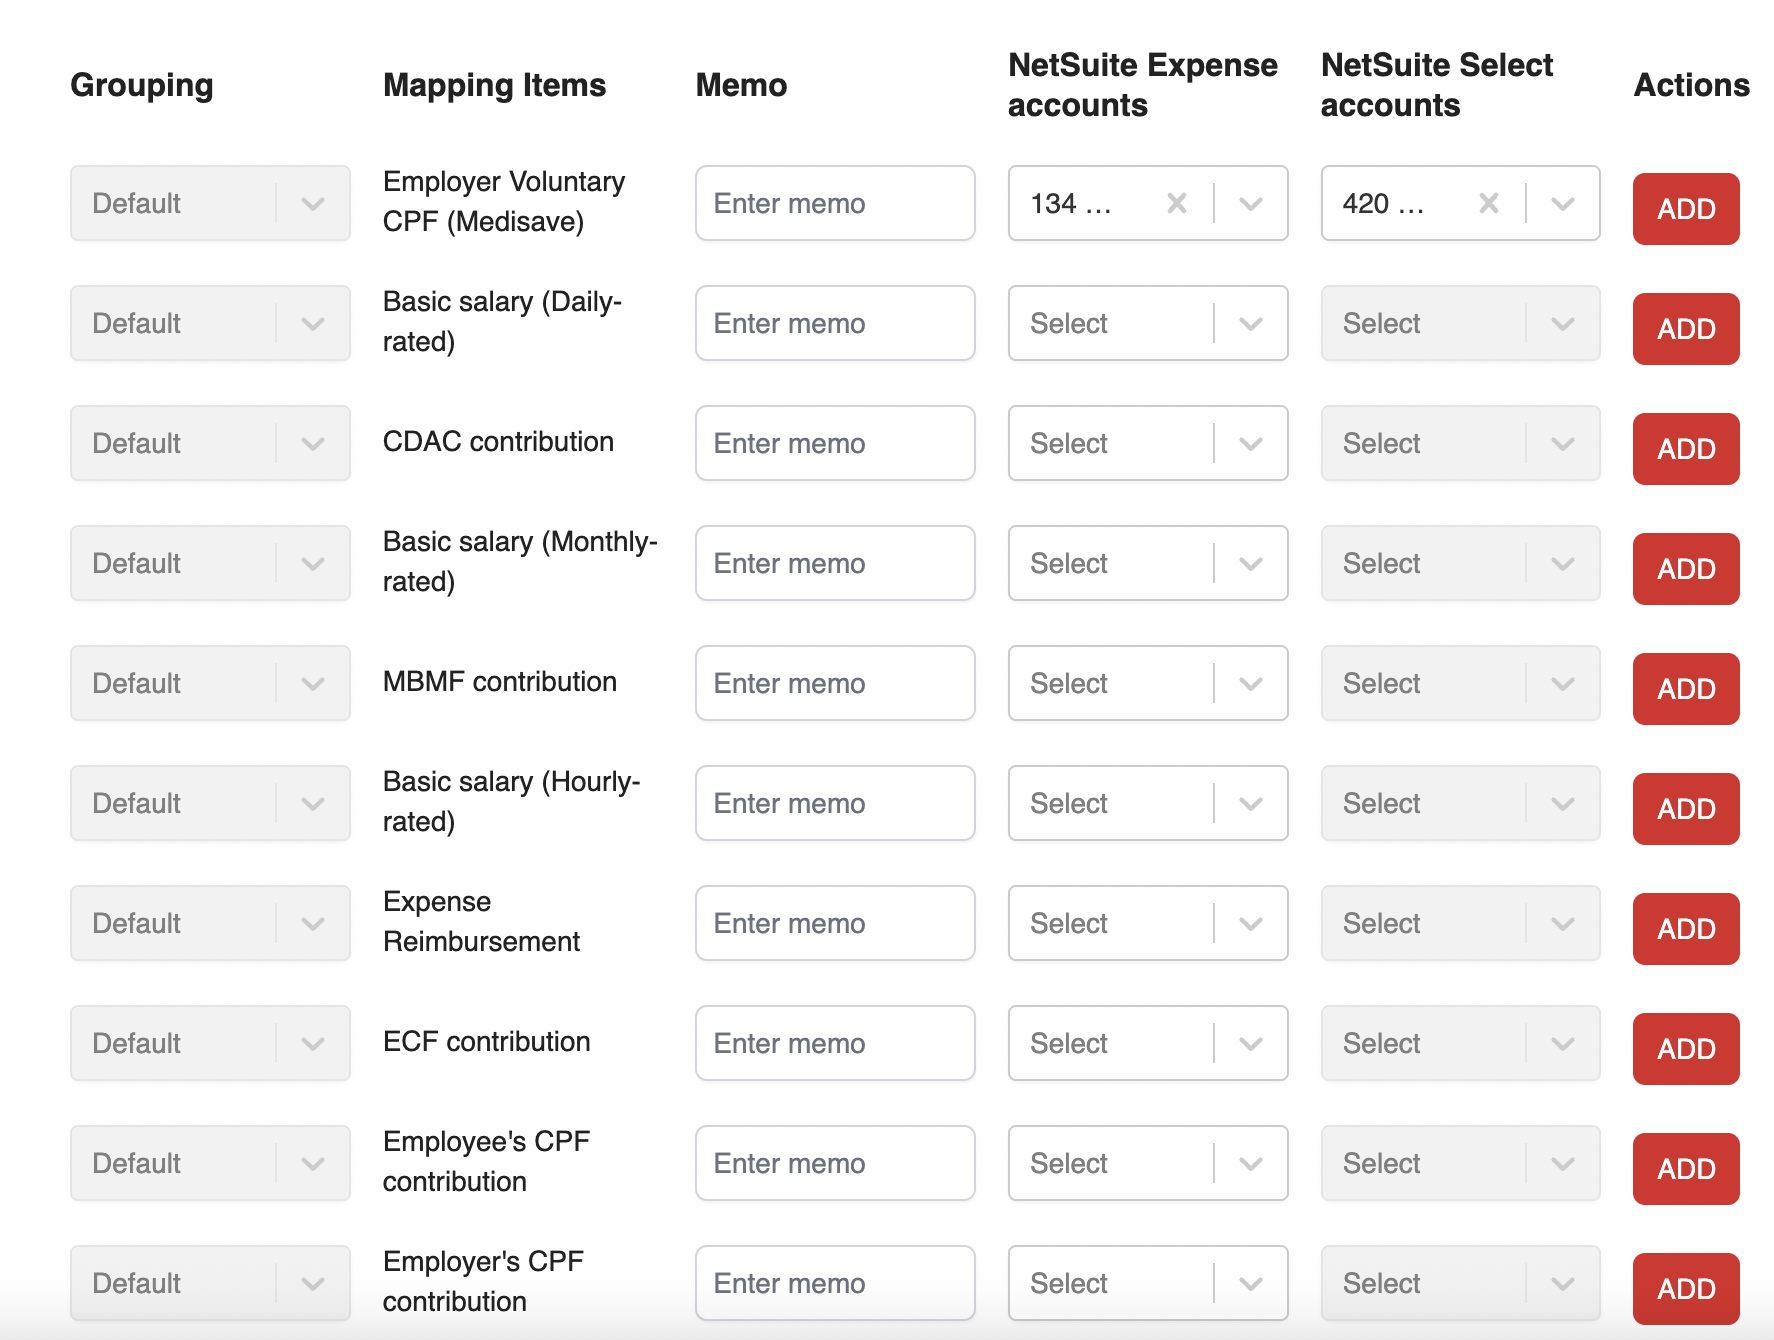
4. Click ADD to assign the mapping to a specific grouping.

5. (Optional) Add a memo if you want notes to appear in the journal entry.

Step 5: Sync Payroll to NetSuite
1. Navigate to Payroll > Team Payroll.
2. Select the approved payroll you want to sync.

3. In the payroll summary, select Click here to resync now to send the data to NetSuite. Syncing may take a few moments depending on the size of your payroll.
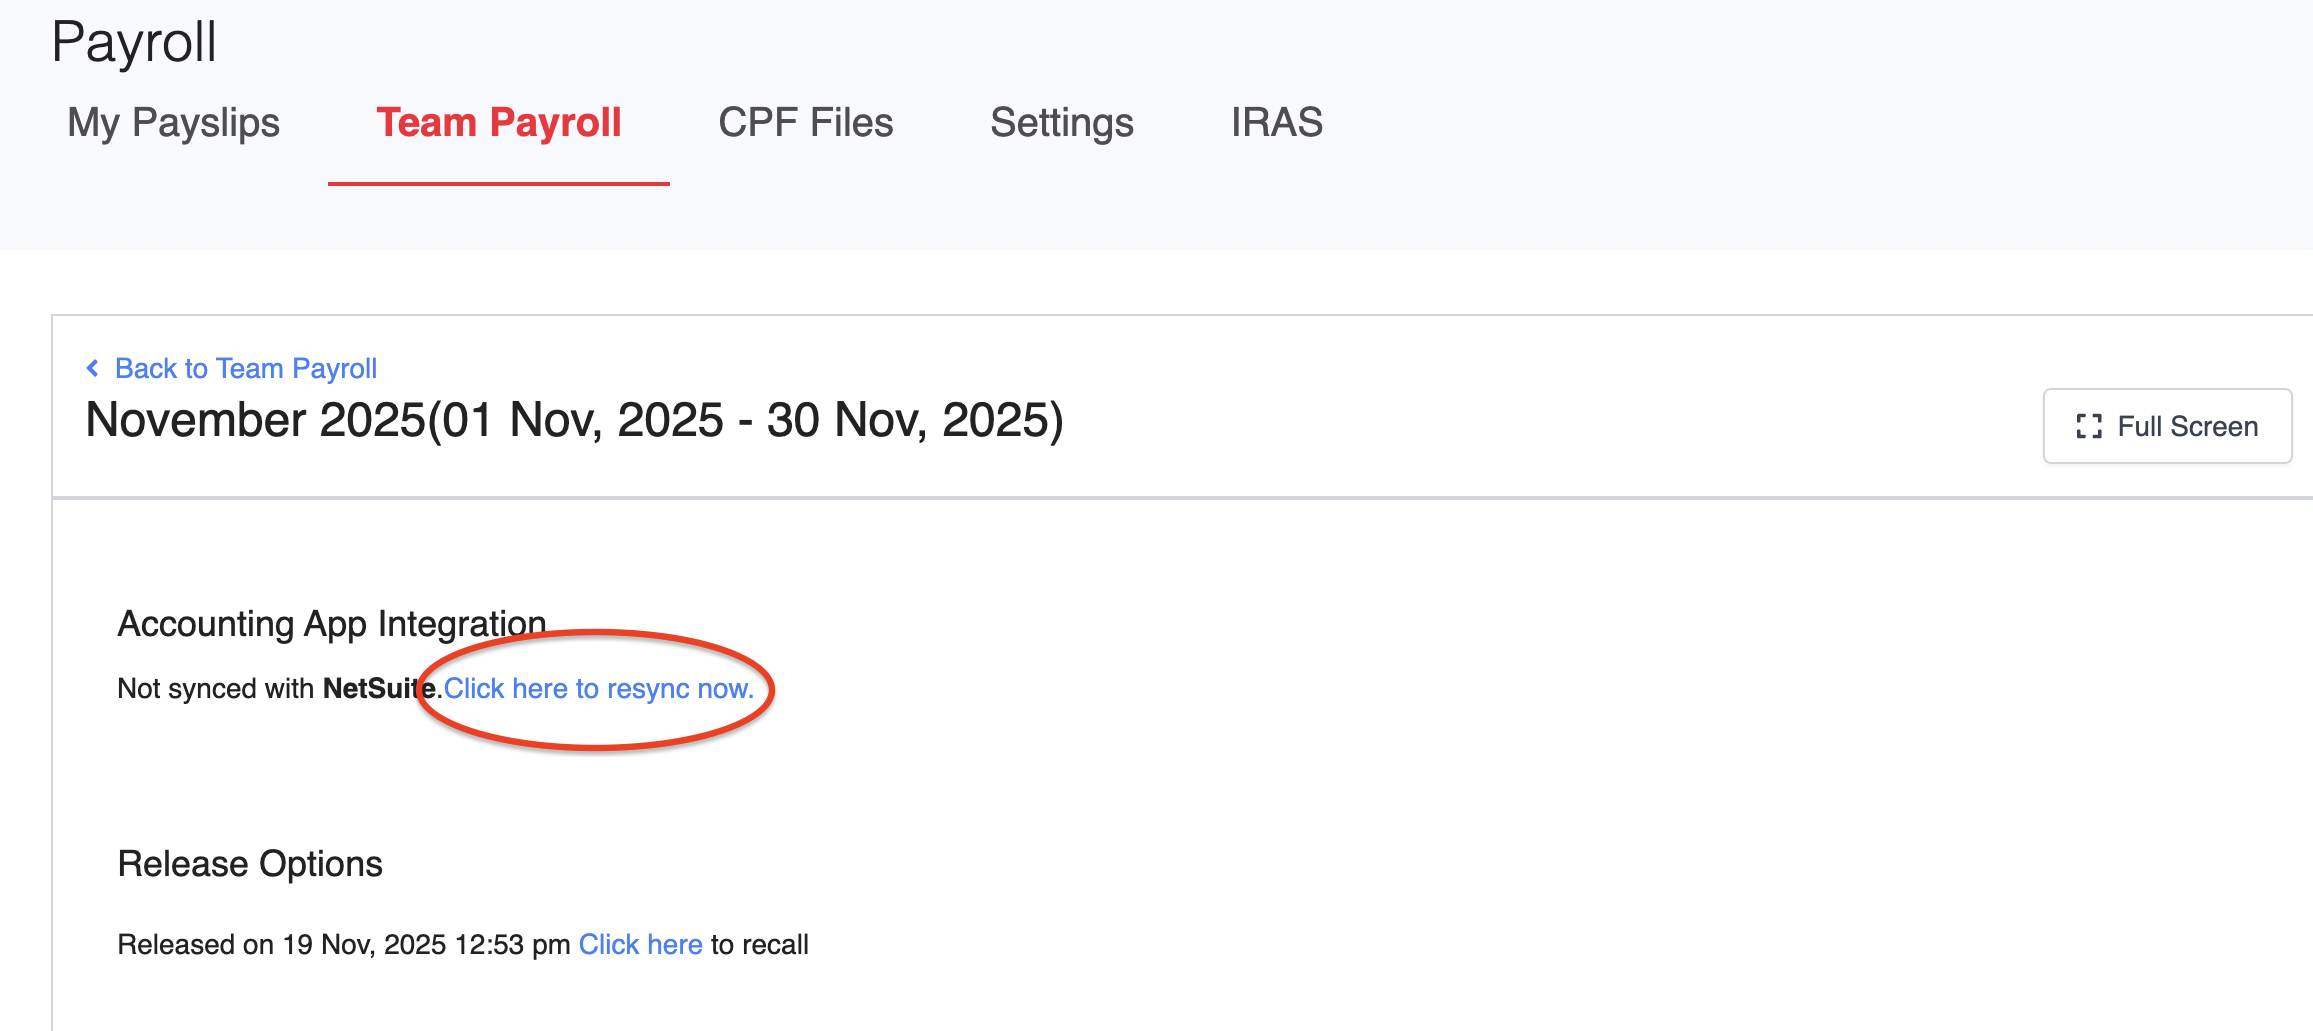
4. Once completed, you can view the resulting journal entry directly in NetSuite.
For a full walkthrough, refer to our video guide:
Was this article helpful?
That’s Great!
Thank you for your feedback
Sorry! We couldn't be helpful
Thank you for your feedback
Feedback sent
We appreciate your effort and will try to fix the article