Bulk Uploading of Timesheets
1. Go to Timesheet > My Timesheets > Timesheet.
2. Select the month you wish to upload the timesheet for.

3. Click More Actions, then select Bulk Upload.

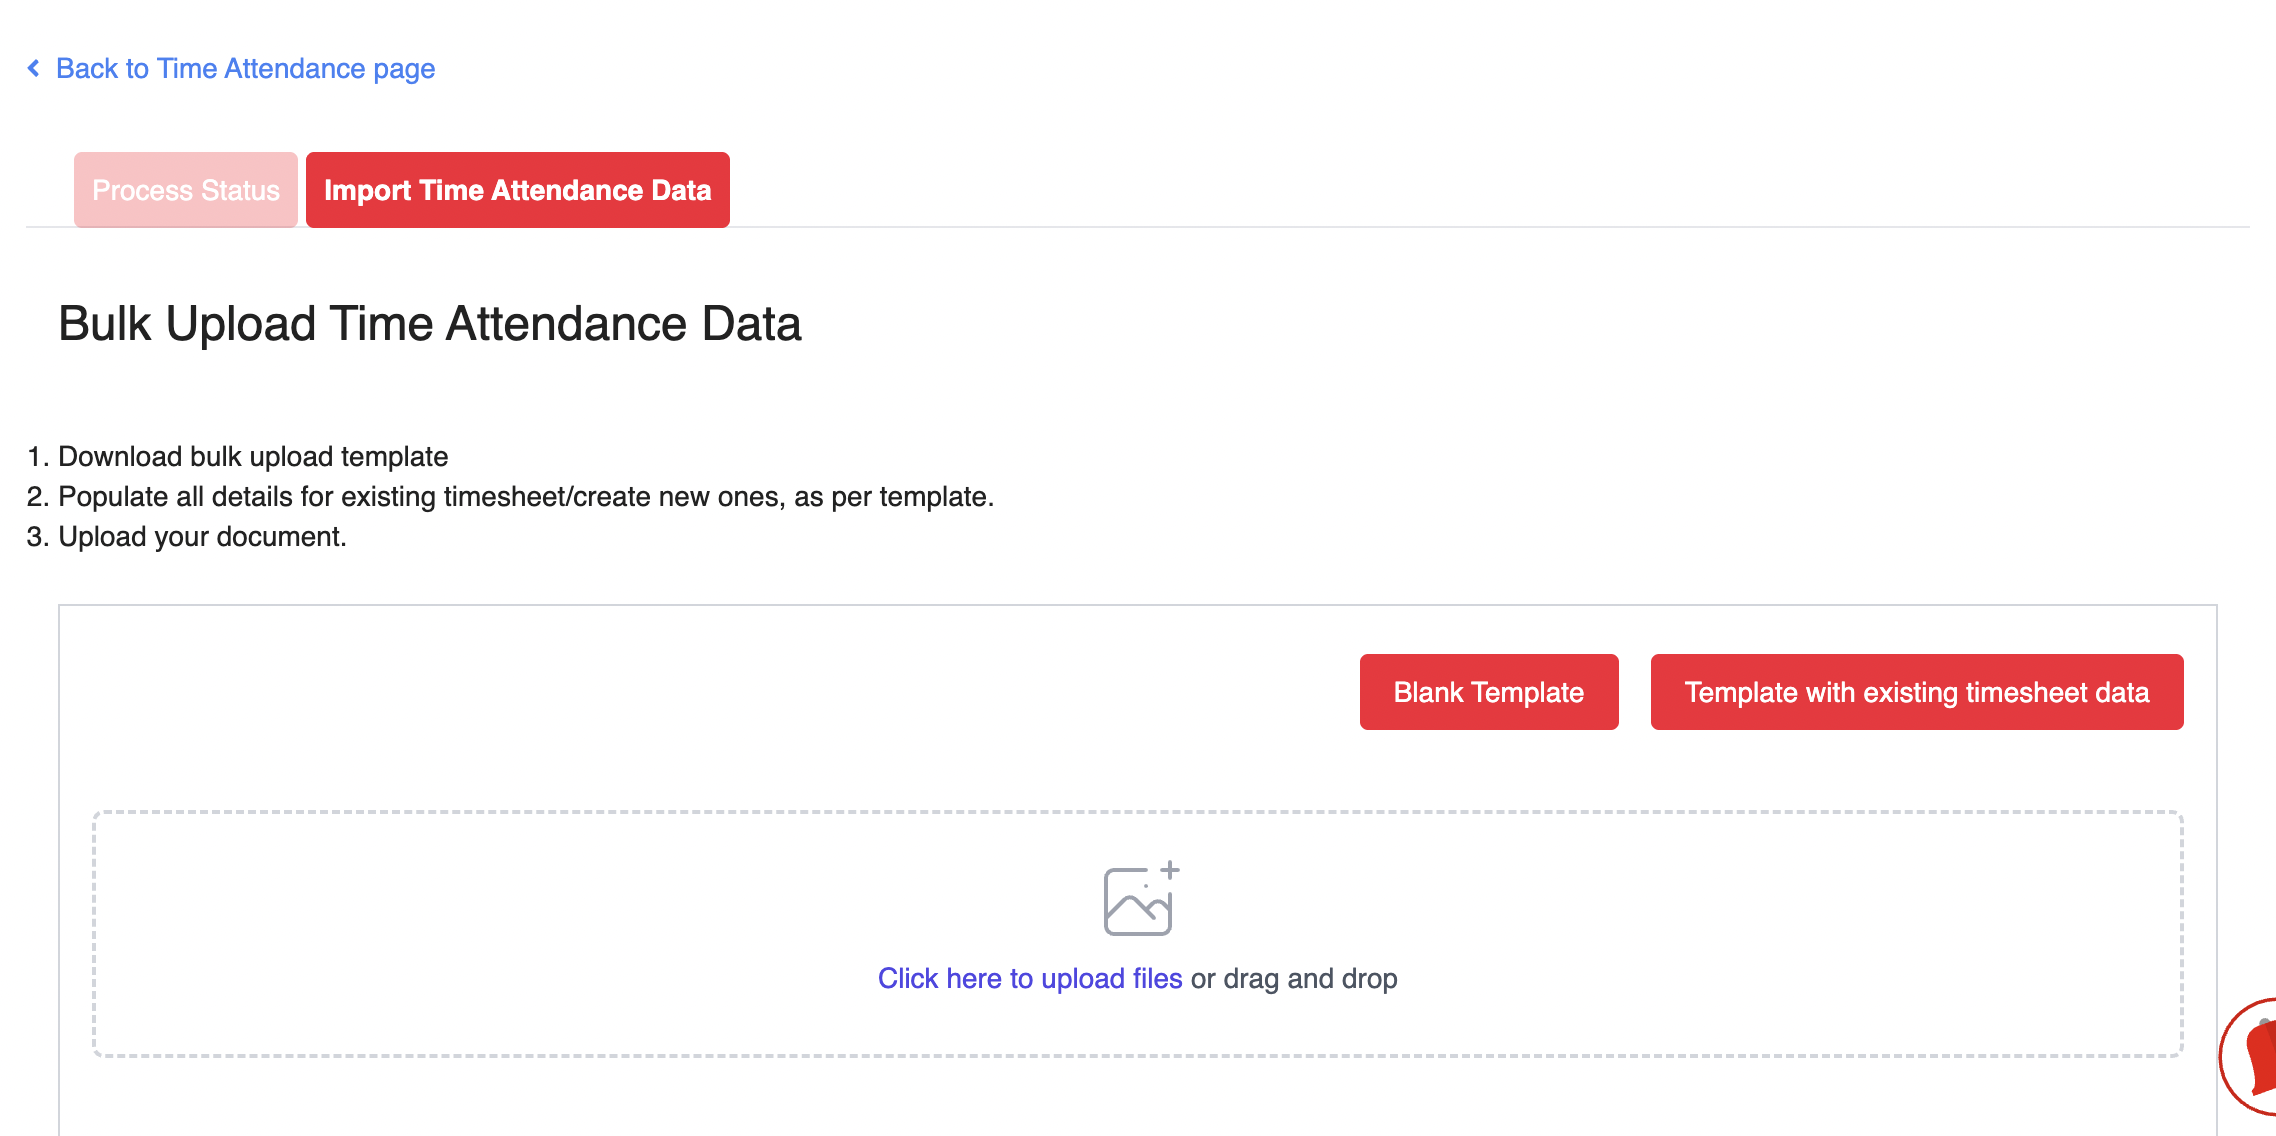
4. Click Import Time Attendance Data. Choose one of the following template options:
Blank Template – to create a new timesheet from scratch.
Template with Existing Timesheet Data – to make changes to existing entries.
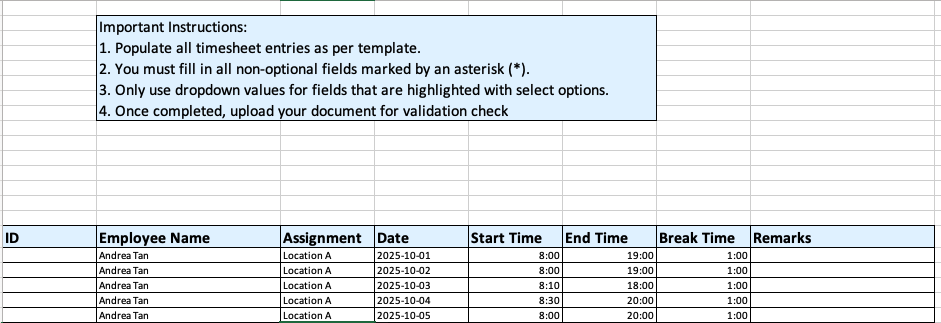
5. After downloading the template, fill in the following fields:
Employee: This field is auto-filled with your name. Do not edit this field.
Assignment: Select the correct assignment from the drop-down list.
Date: Dates for the current month are pre-filled. Avoid editing to prevent errors.
- Start Time: Enter your start time in 24-hour format (e.g., 09:00, 18:00).
- End Time: Enter your end time in 24-hour format (e.g., 09:00, 18:00).
- Break Time: Enter the duration of your break in hh:mm format (e.g., 01:00 for 1 hour, 01:30 for 1 hour 30 minutes).
Note: Break time will be deducted from your total working hours. For example, if you work from 09:00 to 18:00 with a 1-hour break, your total working duration will be 8 hours.
Remarks: Optional. You may add notes for the day if needed.
6. Refer to the attached sample for guidance. Once completed, save the template.
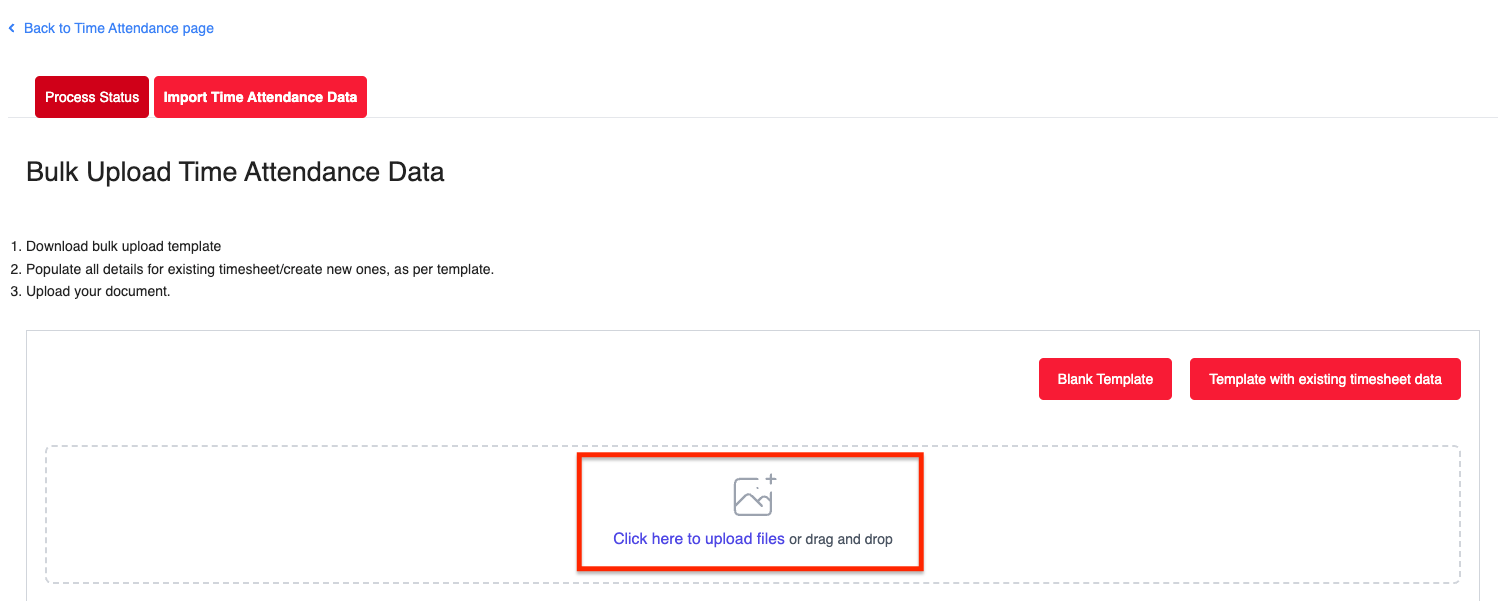
7. Once your file is ready, upload it by clicking Click here to upload files or simply drag and drop it into the upload area.
8. Once uploaded, you'll be redirected to the Process Status page to monitor the progress.

9. When complete, all entries will appear in the employee's timesheet with the status Draft.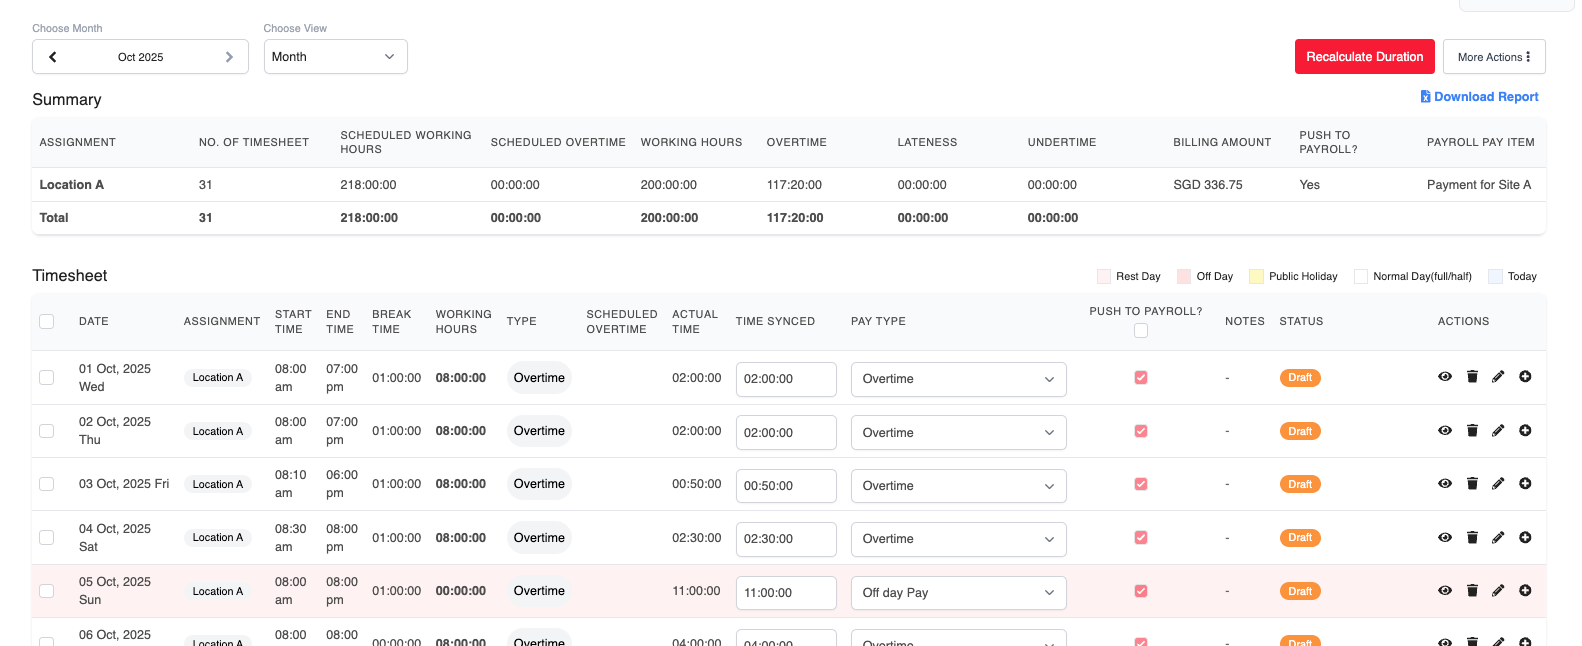
Cloning of Timesheets
By utilizing the Clone feature, you can effortlessly duplicate the timesheet from the previous month. This functionality simplifies the replication of recurring tasks or projects, resulting in improved efficiency.
1. Go to Timesheet > My Timesheets > Timesheets.
2. Select the month for which you are populating the timesheet entries.

3. Please note that the selected month here will serve as the reference month for cloning the previous month's timesheet. In other words, if your selected month here is July, this means that you will be cloning the timesheet entries from June over to July.
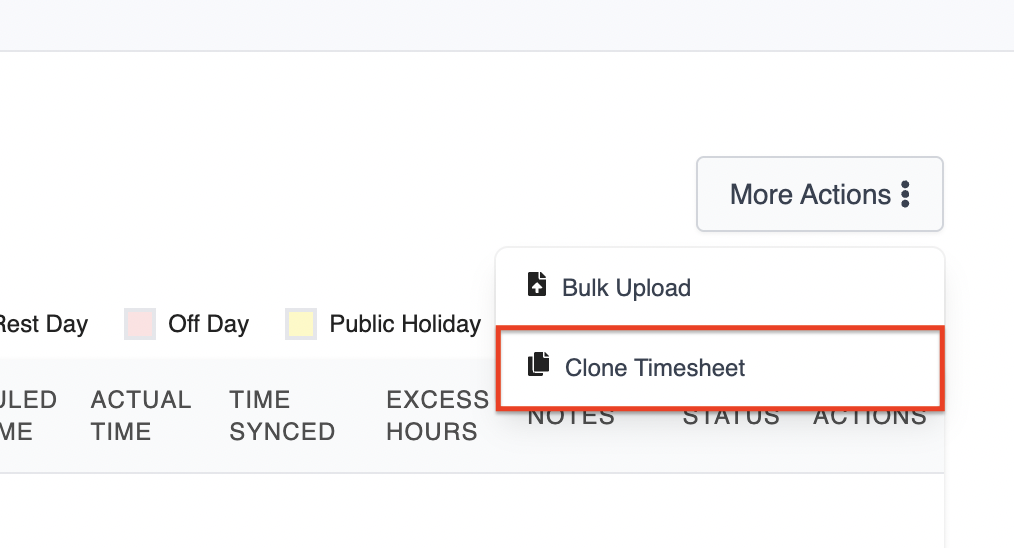
4. Click on the “More Actions” button, and select “Clone Timesheet”.
5. A confirmation pop-up will appear, showing the month being cloned from. Click Save to proceed.
 Important Note: You can only clone the previous month's timesheet.
Caution: Cloning will overwrite all existing timesheet entries in the current month.
6. Once cloning is complete, you'll see identical entries in the employee's timesheet with the status Draft, marked as “Auto created from clone timesheet.”

Was this article helpful?
That’s Great!
Thank you for your feedback
Sorry! We couldn't be helpful
Thank you for your feedback
Feedback sent
We appreciate your effort and will try to fix the article