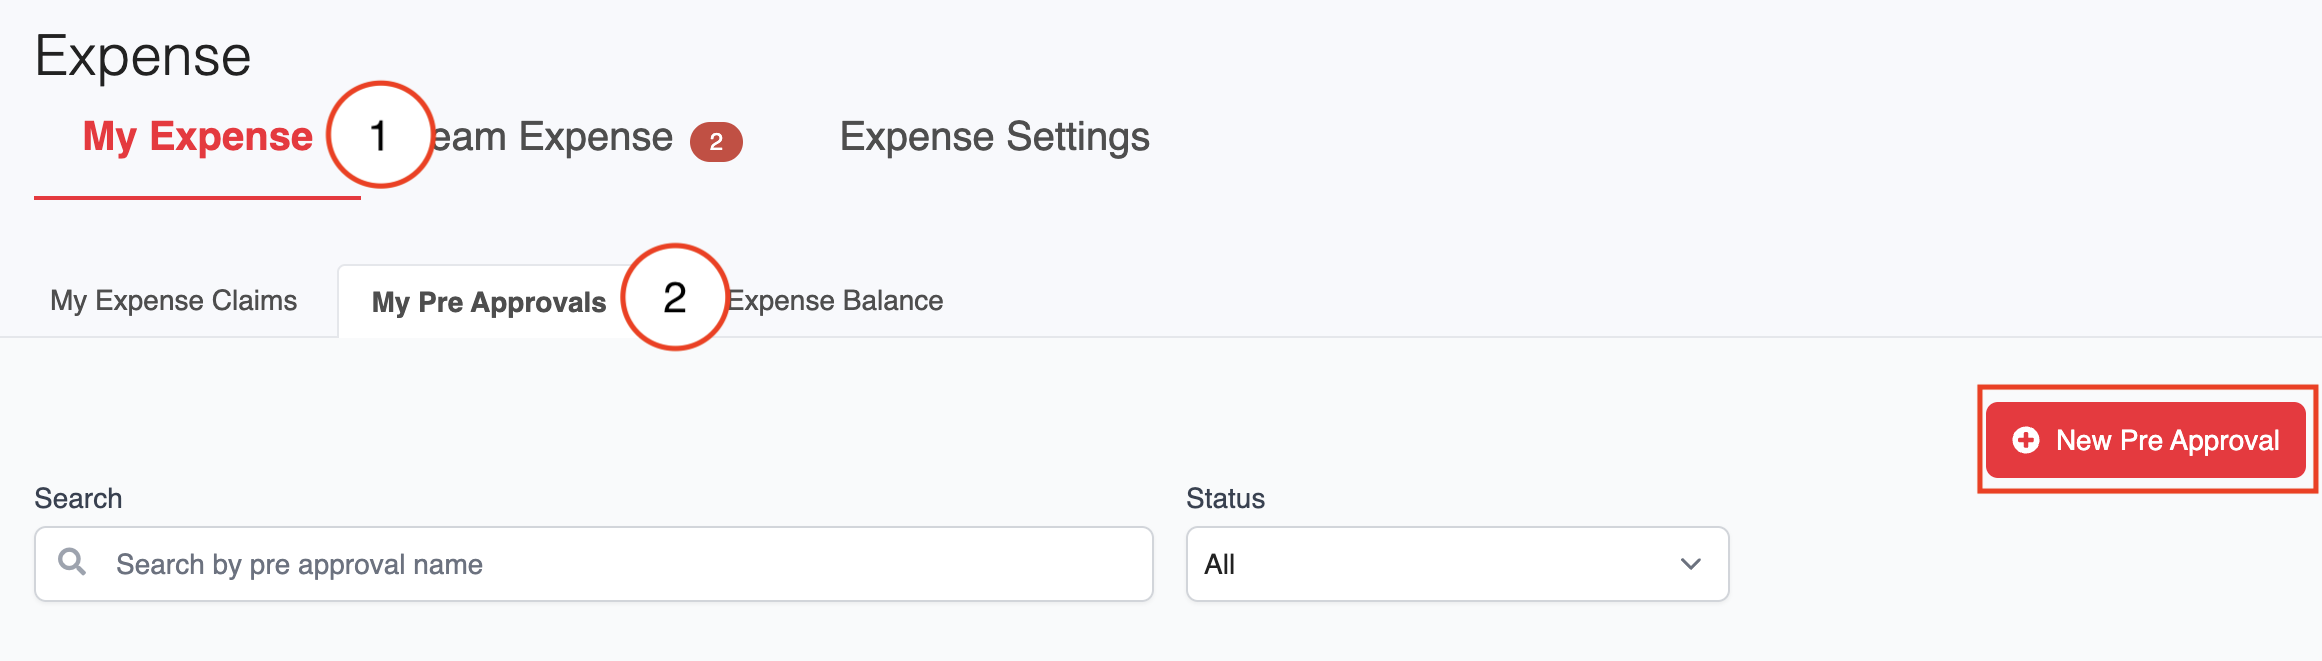
Go to Expense > My Expense > My Pre Approvals > Click on the New Pre Approval button.
This brings up a pop up window to add a pre approval.

Name: Name of pre approval is mandatory
Description: A short description of what this pre approval request is for
Start Date: The start date from which the pre approval will apply
End Date: The end date after which the pre approval will no longer apply
Set Limits: Tick this box to set limits
Expense type 1:
Select Expense Type
Amount: Key in the limit amount
Type: Choose to limit per request/per day/month/per calendar year
Red Bin Icon: Delete an expense type (Note: at least 1 expense type is mandatory)
'+' Icon: Add more limit options within the same expense type
Save as draft/Submit: Have the option to save the request as a draft or submit it for approval
Was this article helpful?
That’s Great!
Thank you for your feedback
Sorry! We couldn't be helpful
Thank you for your feedback
Feedback sent
We appreciate your effort and will try to fix the article