You can use the Performance Manager to set up KPIs for your employees and invite the relevant people to provide feedback on employee performance.
Here are the steps to get started with the Performance Manager:
Set up Objectives
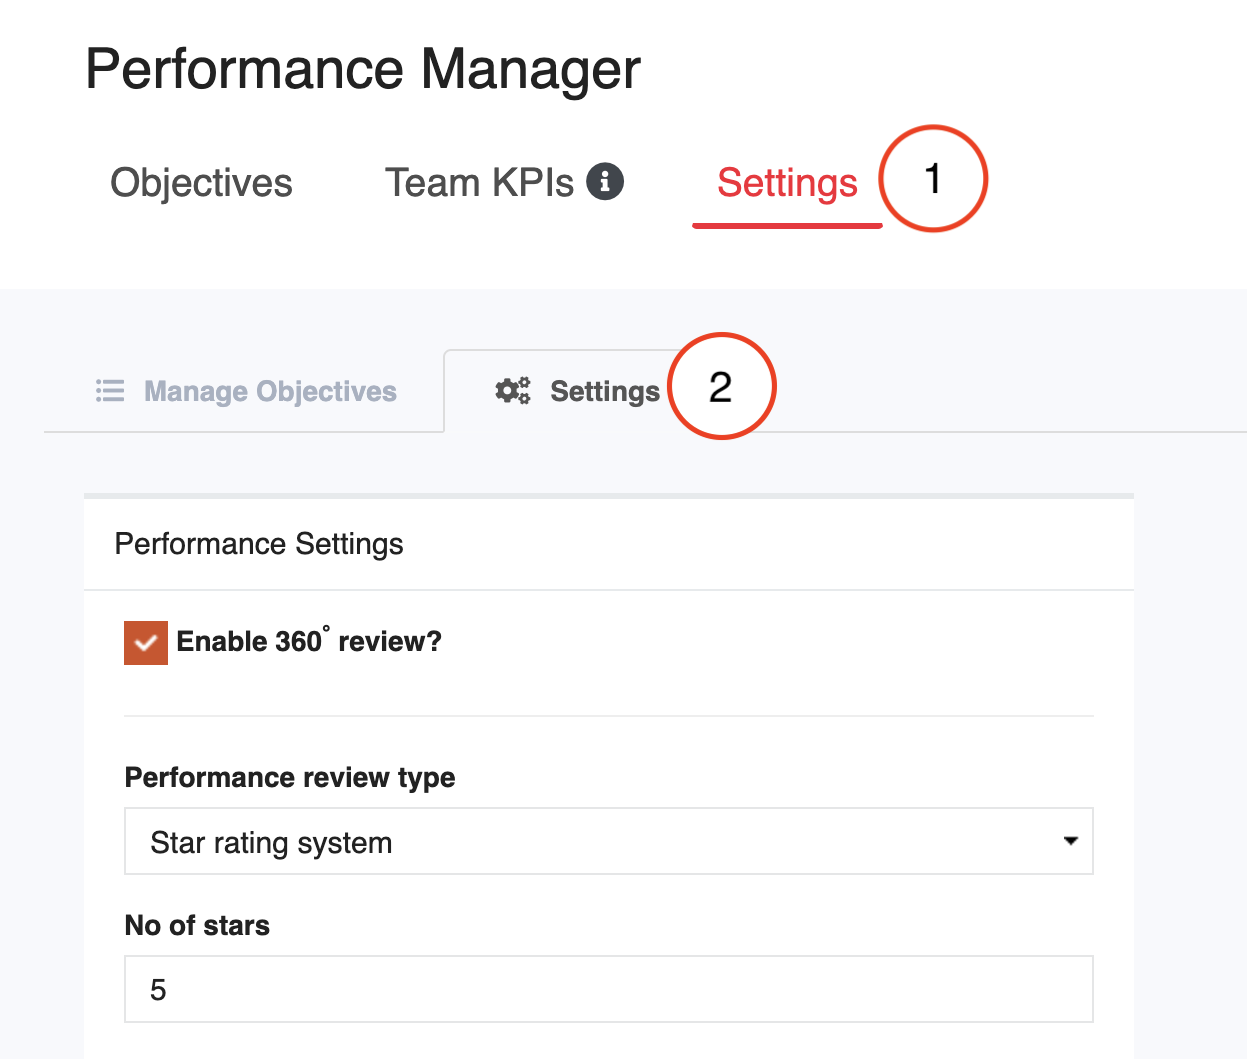
Go to Performance Manager > Settings
You'll see the Manage Objectives tab.

Objectives are broken down into Corporate, Department and Individual level objectives.
All employees will see Corporate objectives, while only employees in the specified department will see Department objectives, and individual employees will only see their individual objectives assigned to them.
Employees will only be able to view these objectives without being able to make any edits.
Click on the Add new Objective button to add a new objective. You can also click on the pencil icon next to existing objectives to edit them, or the delete icon to delete them.
Set up Performance Review Type
Before using the Performance Manager for employee appraisal, you will need to define which performance review method to use.
Note: You will need to have admin permissions for the Performance Manager module in order to do this.
Go to Performance Manager > Settings > Click on the Settings tab

360 review
The 360 Review enables all of an employee's colleagues to provide feedback about his/her performance, even if they are not in the same team or department, including their own reporting manager.
To allow employees to provide feedback for their peers and reporting managers, tick the Enable 360 review option. If left unticked, employees will only be able to do a self review, and managers will only be able to review their subordinates.
Review type
Then, choose a rating system from the performance review type dropdown: either the Star rating system or the Thumbs up/down rating system.
If the Star rating system is chosen, key in the number of stars to use for the rating.

Allowing employees to edit/create KPIs
By default, employees will not be allowed to edit/create their own KPIs.
If you tick Allow for a particular timeframe, you can choose a start and end date to allow this to be done.
Beyond the end date, or if No is ticked, only admins will be able to edit or create KPIs.
Managers can only create new KPIs, not edit/delete KPIs for their direct reports. This is to ensure accountability. They will need to ask their own manager or an admin to edit/delete KPIs for their direct reports.
Allowing managers to view ratings
By default, managers will be able to see any ratings that their subordinates have submitted as and when they are added.
If you wish to only allow managers to view ratings after a certain point in time, e.g. the end of the appraisal period, tick Only after this date and choose a date.
Click the Save button to save these changes.
Set up Employee KPIs
The Team KPIs tab allows admins or managers to manage and oversee KPIs.
You can create KPIs one by one for individual employees, as well as in bulk for multiple employees if they have the same KPI.
Creating KPIs individually
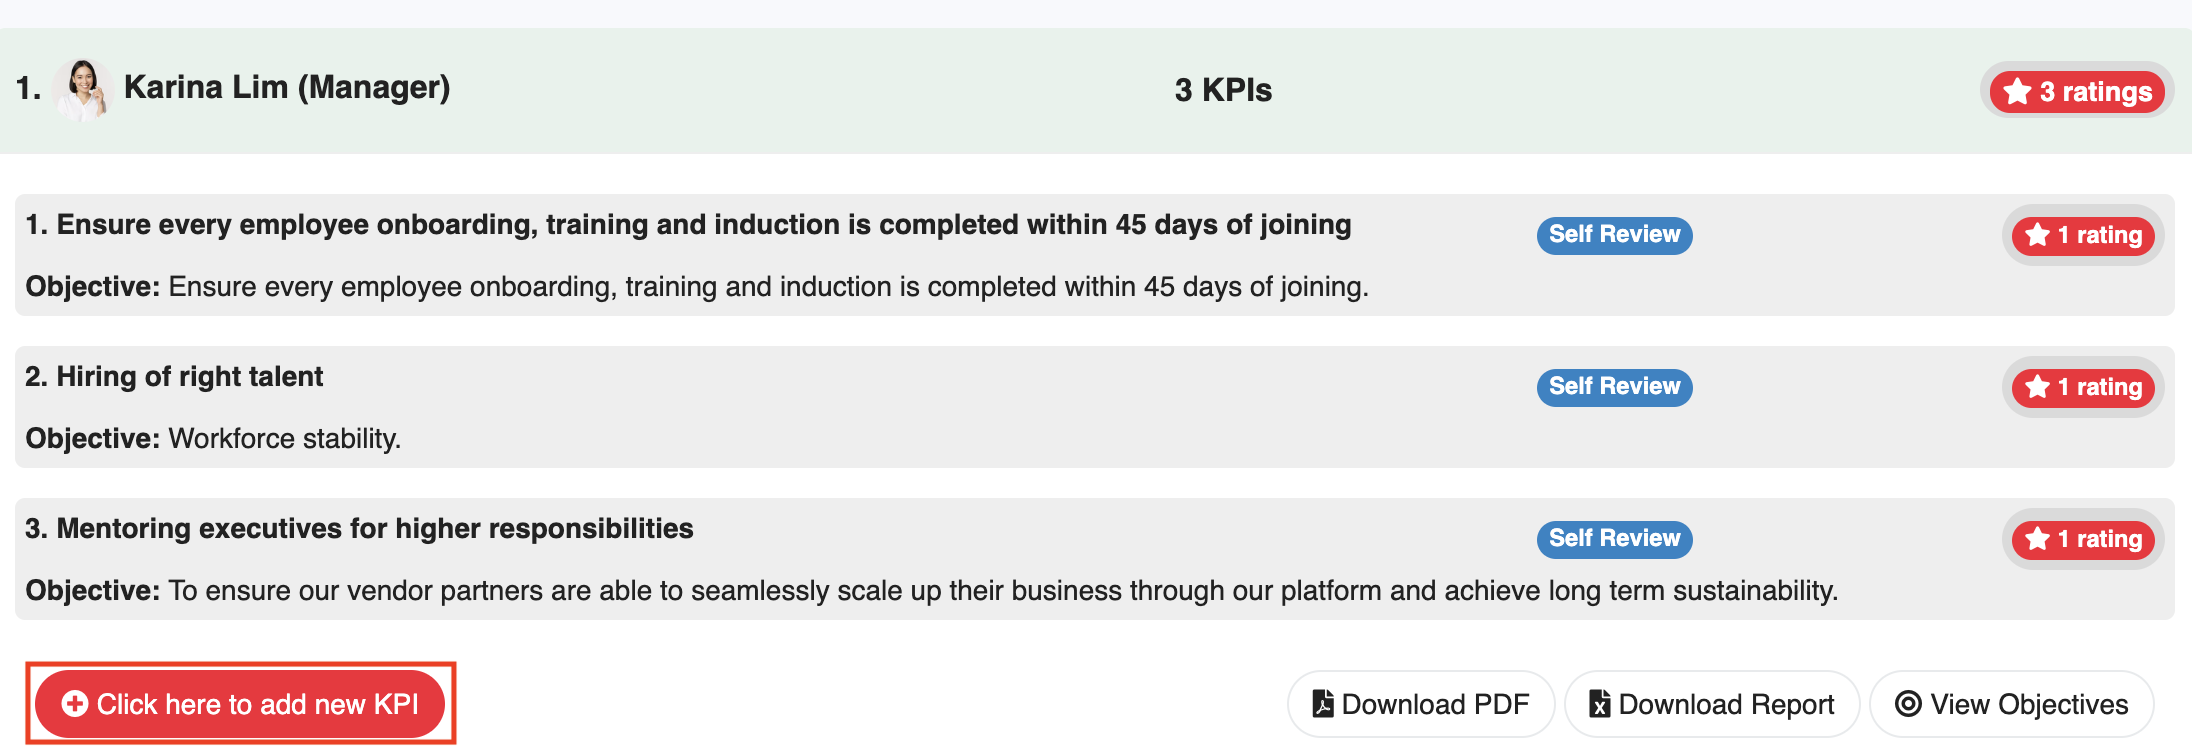
Go to Performance Manager > Team KPIs.
Click on the relevant employee's section to expand it, then scroll down to the bottom and click on the button Click here to add new KPI.

There will be a pop-up window where you can input the necessary info.

Title: The name of the KPI
Description: A short description of what the KPI is (optional)
Associate with objectives: The KPI can be associated with a corporate, department or individual objective (optional)
Start date: Date from which the KPI will be assessed
End date: Date at which the KPI will stop being assessed (optional)
Open ended question: If ticked, the KPI will require an open-ended response. If unticked, the KPI will utilise the rating system.
Allow self review: If ticked, the KPI will be open to the employee to review. If not, only their manager will be able to review it.
Enable 360 review: If ticked, the KPI will be open to all of the employee's peers to review. If not, only their manager will be able to review it.
Once done, click on the Create button to create the KPI.
Creating KPIs in bulk
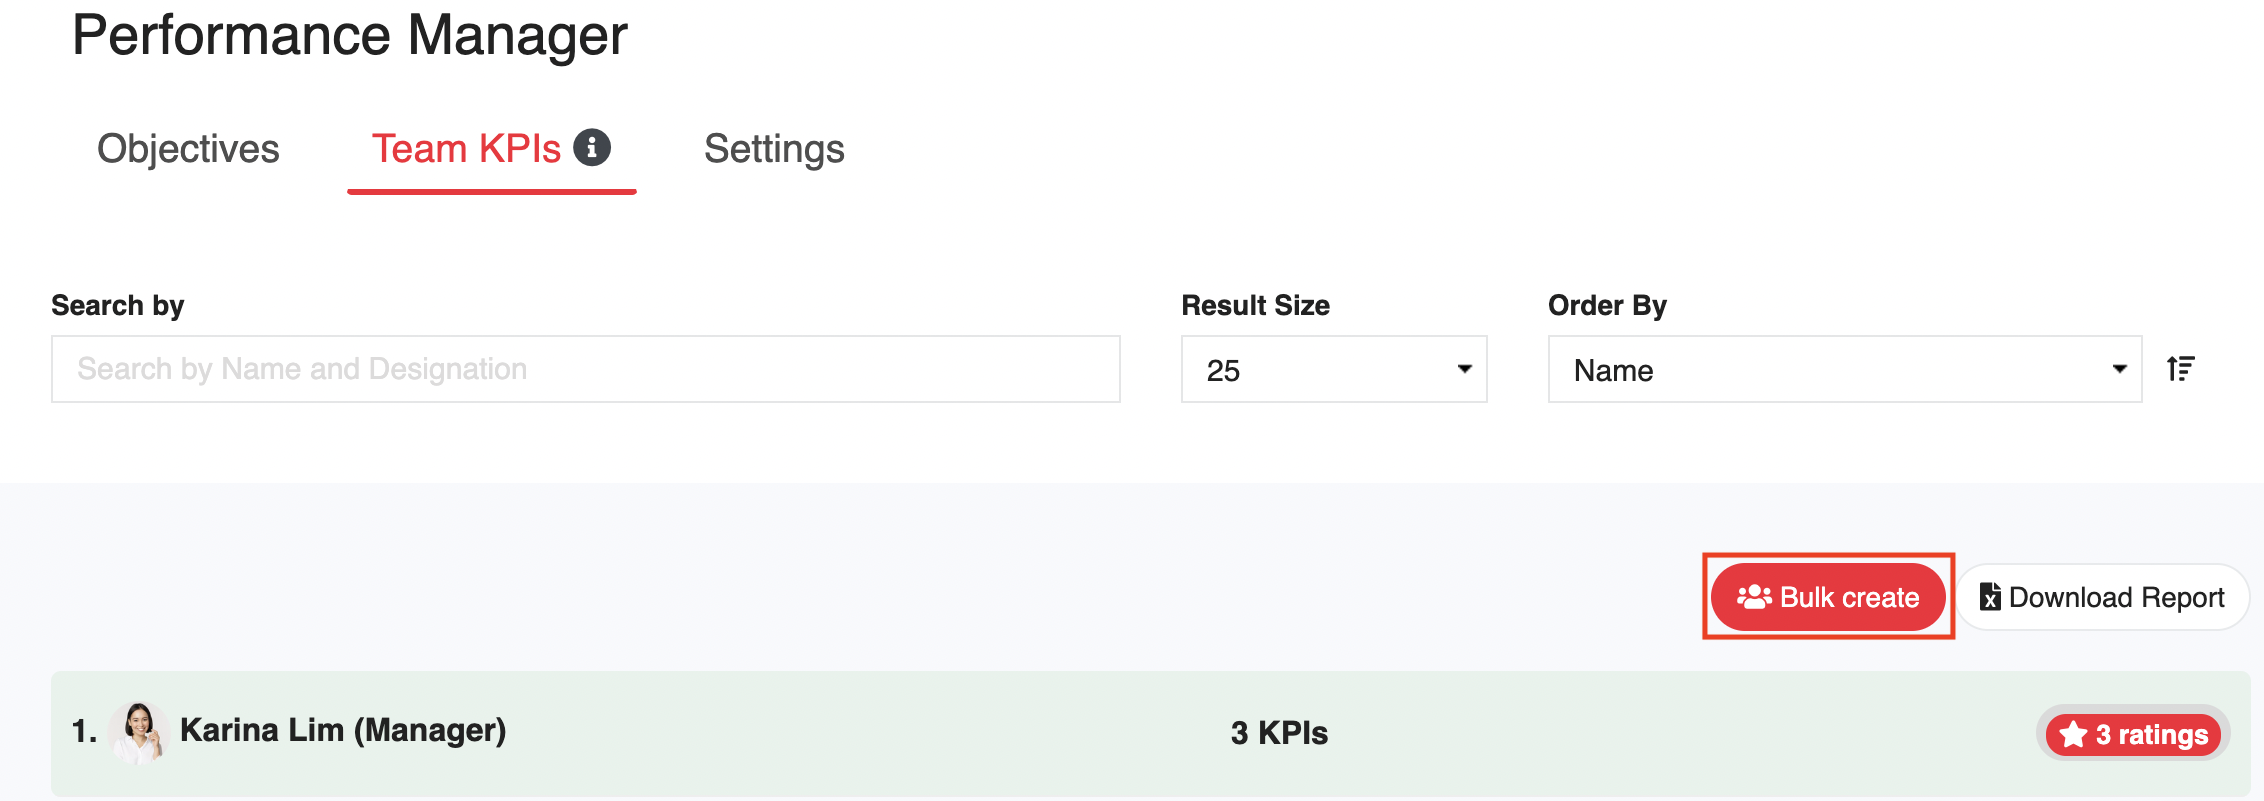
To create KPIs in bulk, click on the bulk create button at the top right.

There will be a pop-up window where you can input the necessary info.

Title: The name of the KPI
Description: A short description of what the KPI is (optional)
Associate with objectives: The KPI can be associated with a corporate objective (optional)
Note: If you wish to associate the KPI with a department or individual objective, you will need to create the KPI at the individual employee level.
Start date: Date from which the KPI will be assessed
End date: Date at which the KPI will stop being assessed (optional)
Open ended question: If ticked, the KPI will require an open-ended response. If unticked, the KPI will utilise the rating system.
Allow self review: If ticked, the KPI will be open to the employee to review. If not, only their manager will be able to review it.
Enable 360 review: If ticked, the KPI will be open to all of the employee's peers to review. If not, only their manager will be able to review it.
Once done, click on the Create button to create the KPI.
Editing/deleting a KPI
You can edit or delete a KPI by clicking to expand it, then clicking on the respective Edit and Delete buttons.

Once the KPIs have been created, you can evaluate each employee on their performance.
At the end of the assessment period, you can also download reports for both individual employees and the entire team.
Was this article helpful?
That’s Great!
Thank you for your feedback
Sorry! We couldn't be helpful
Thank you for your feedback
Feedback sent
We appreciate your effort and will try to fix the article