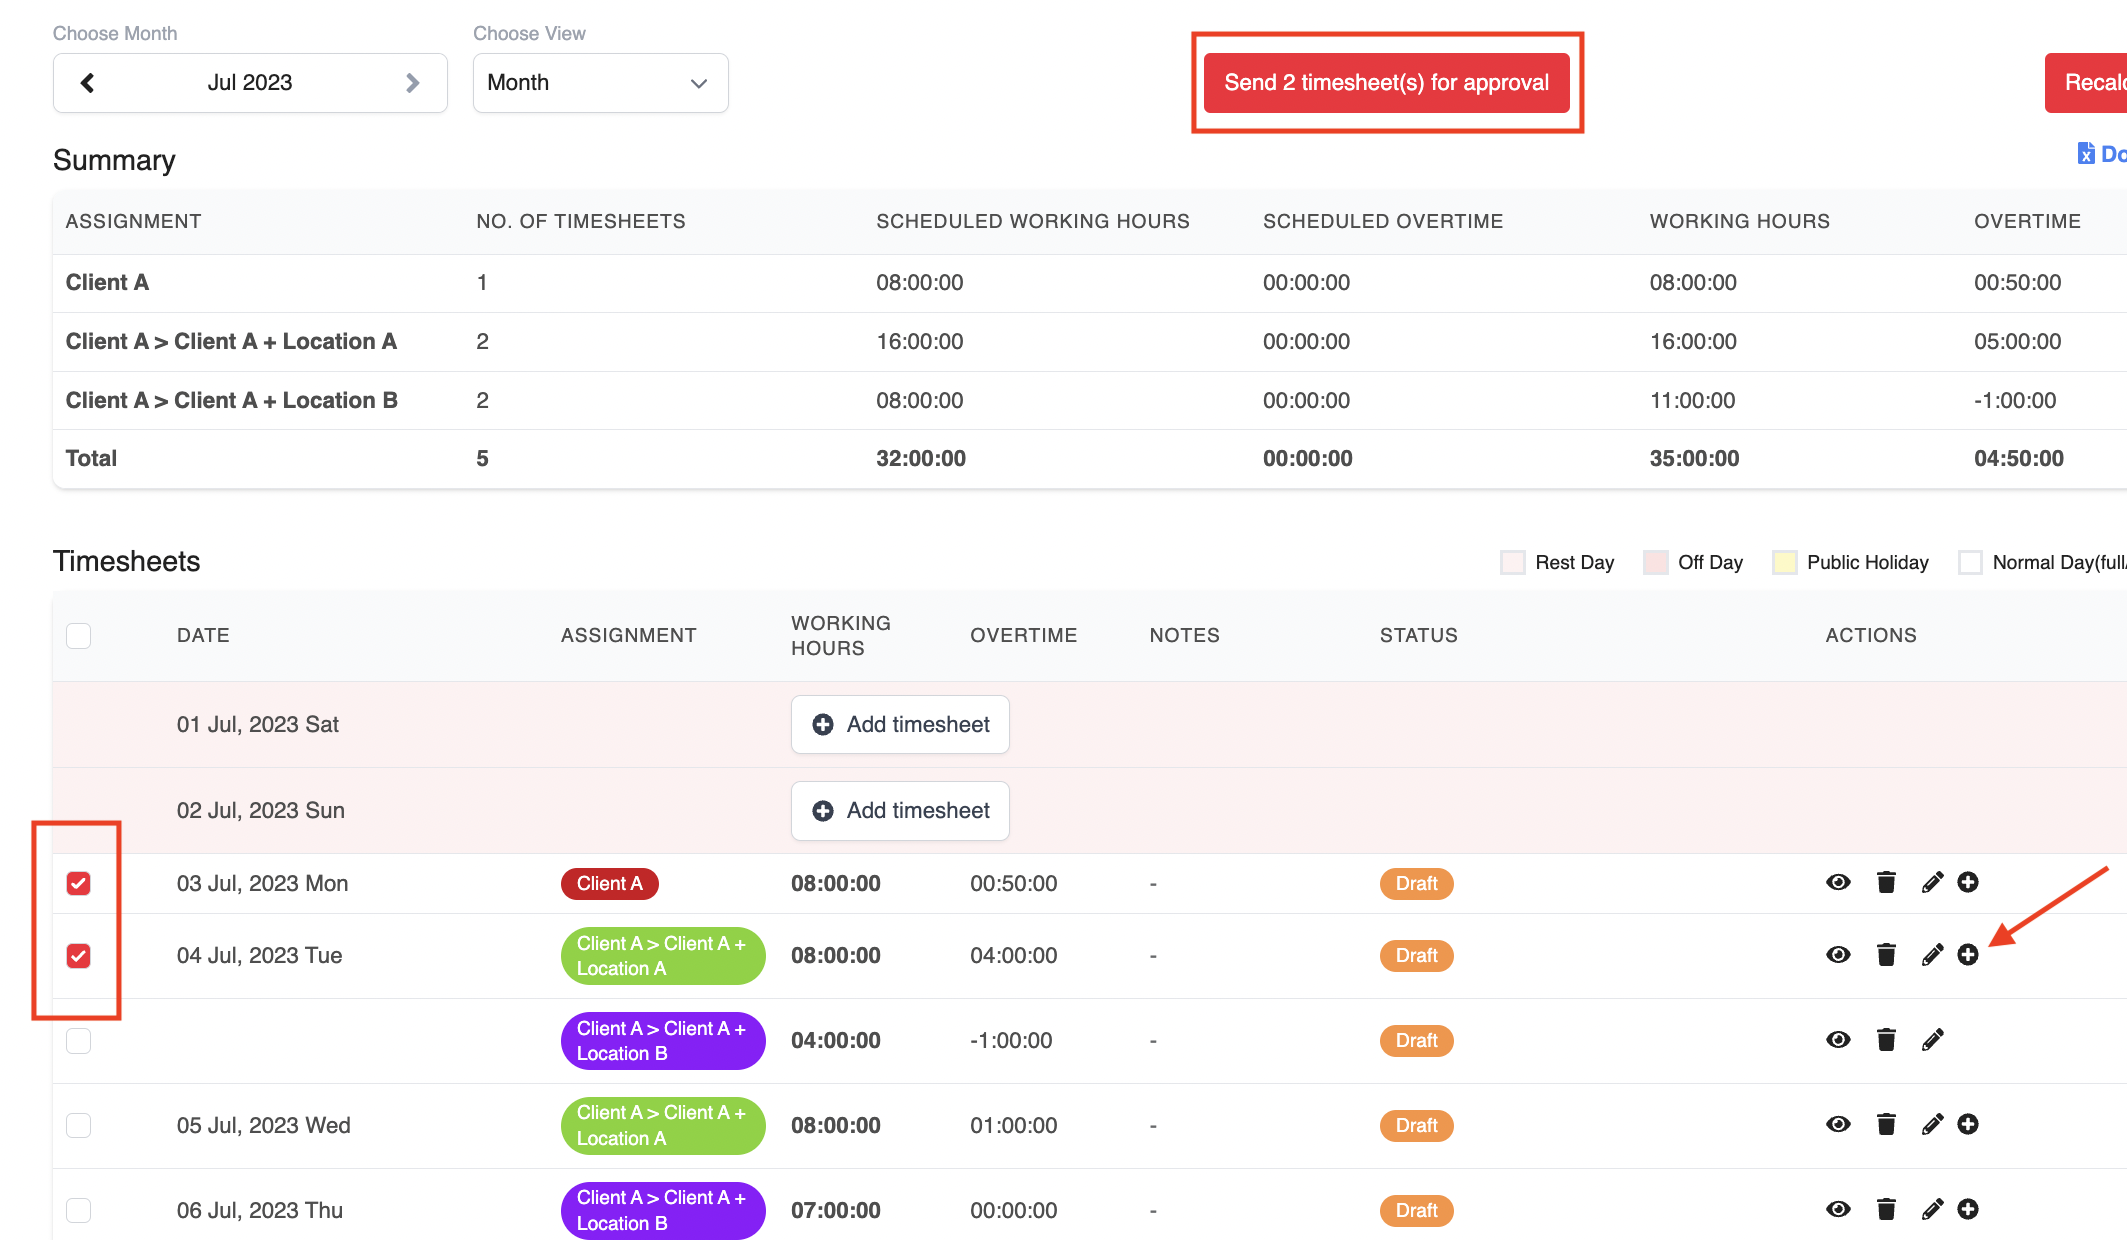
Go to Timesheet > My Timesheet.
By default, you will land on the current week/month. To toggle to another week/month, use the arrows at the top left hand corner.

Fill in the timesheet accordingly, with the:
Start time and end time OR duration (hours) - *Only applicable for organizations that allow employees to key in their Timesheet manually; otherwise, set the timesheet according to their scheduled hours
Break time *this is mandatory
Remarks (if any)
Depending on your company's settings, overtime may be calculated automatically. If you are not eligible for overtime, it will not show up in your timesheet.
You can use the "+" button in the ACTIONS column to add an additional timesheet for that date.

Once you are ready to submit your timesheet(s), either tick the checkbox on the top left, or tick the checkboxes for the individual dates that you wish to submit. Then, click on the Send button.
Once submitted, the Status will be updated to Approval pending.
How to edit a submission
Go to My Timesheet > Submissions tab and click on the relevant submission.

Scroll down to the timesheet section and make the necessary edits. As long as the submission has not been approved, you can make as many edits as you need. Changes will be saved automatically.
Was this article helpful?
That’s Great!
Thank you for your feedback
Sorry! We couldn't be helpful
Thank you for your feedback
Feedback sent
We appreciate your effort and will try to fix the article

