On the Web
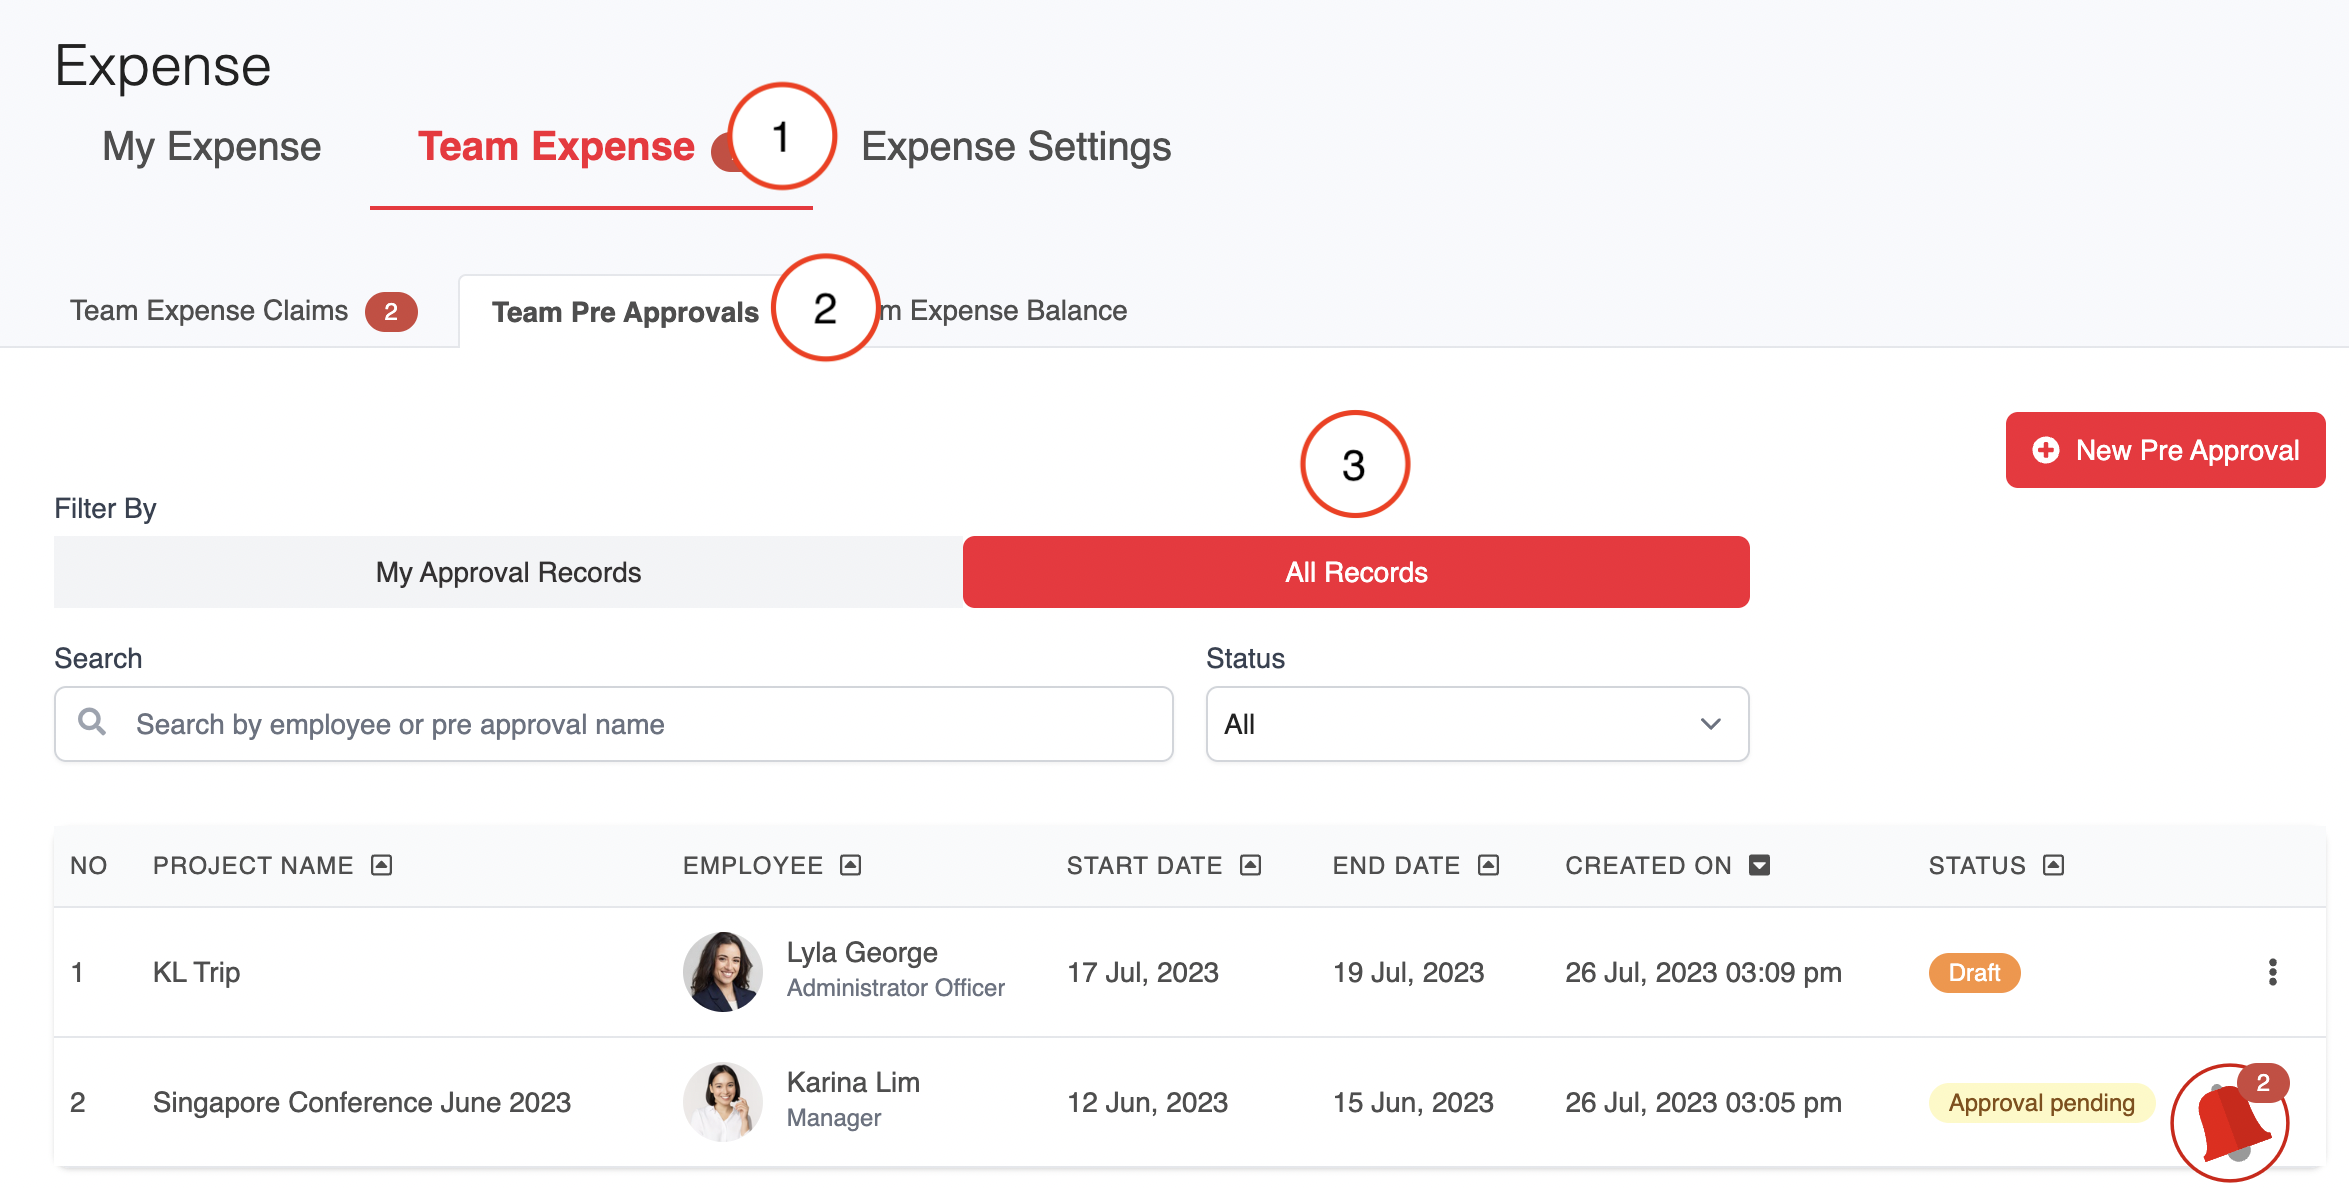
Go to Expense > Team Pre Approvals > All Records
This offers an overview of any pre approvals submitted by your team or the company.

You can search for a specific employee or pre approval name in the search bar.
You can also filter by the Status of the pre approval request (All, Approved, Pending, Rejected).
Project Name: The name of the project for the pre approval
Employee: The employee that the pre approval applies to
Description: Short description of what the pre approval is for
Start Date: The start date from which the pre approval will apply
End Date: The end date after which the pre approval will no longer apply
Created on: When was the pre-approval request made
Status: Approved/Pending/Rejected
Managing Pre Approvals
To manage pre approvals, click on the 3 dots menu to View, Edit or Delete

Editing Pre Approvals

Name: Name of pre approval is mandatory
Select Employee: The employee requesting the pre approval
Description: A short description of what this pre approval request is for
Start Date: The start date from which the pre approval will apply
End Date: The end date after which the pre approval will no longer apply
Set Limits: Tick this box to set limits
Expense type 1:
Select Expense Type
Amount: Key in the limit amount
Type: Choose to limit per request/per day/month/per calendar year
Red Bin Icon: delete an expense type
'+' Icon: to add more options within the same expense type
Save/Cancel: Save or cancel the configuration for the pre approval
On Mobile
Go to HR > Expense > Team Expense.
Go to Team Pre Approvals > All records. Click into the pre approval record and tap on the Edit icon at the top right of the screen to update a pre approval request.
Was this article helpful?
That’s Great!
Thank you for your feedback
Sorry! We couldn't be helpful
Thank you for your feedback
Feedback sent
We appreciate your effort and will try to fix the article